Scanning Documents into an Application on a Computer Using TWAIN
Use the TWAIN scanner from a computer to scan the original placed on the machine into an application that supports TWAIN.
Connect the machine to the network and install the TWAIN driver in advance.
TWAIN supporting application
To use the TWAIN scanner, install an application that supports TWAIN on the computer. Various image editing applications support TWAIN. For the installation and operation procedure of each application, see the use manual provided with the application.

The TWAIN driver operates in 32-bit mode. On a computer running an operating system in 64-bit mode, use an application operating in 32-bit mode.
Connect the machine and computer in the same network segment as shown below.
The IP addresses of the machine and computer match except in the last number "ddd" in "aaa.bbb.ccc.ddd"
The machine is connected via the link local address when using IPv6
When you scan a document with the TWAIN driver, you cannot save it in multi-page TIFF format. After scanning the file with the TWAIN driver, change the file format.

While the machine is processing an OCR file, scanning with the TWAIN scanner is possible only with the ADF Read-ahead function enabled in the Scanner Control dialog box.
Place the original on the machine.
Placing an Original to ScanStart a TWAIN supported application on the computer.
In some applications, specify the machine as the scanner to use in the setting screen such as the scanner settings.Display the configuration screen of the TWAIN driver.
Specifying the original orientation.

To display the scanned pages in the correct vertical orientation on the computer, specify the orientation that matches the orientation of the original placed on the machine in the TWAIN driver.
Select the location where the original is set in [Original Scan Method:].
Select [
 ] or [
 ] in [Orig.Orientn.:].
Specify [Orientation:].
When placing the original on the exposure glass
When placing the original in the ADF
Orientation to place the original
[Orientation]
Orientation to place the original
[Orientation]
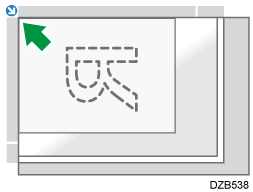

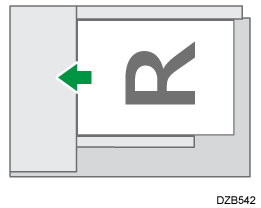

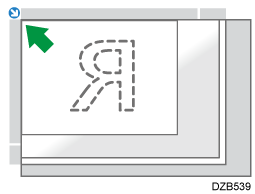


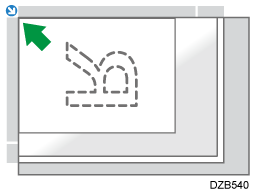

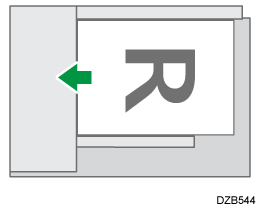

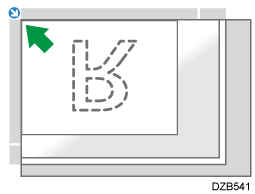

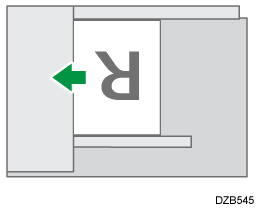

When placing the original in the ADF, select [1 Sided], [2 Sided(Top to Top)] or [2 Sided(Top to Bottom)] in [Scan Settings:].
Configure the other scan settings according to the purpose of the scanned data.
For details, see the TWAIN driver Help.Click [Scan].
If you are scanning another page, place it in the same location and continue scanning until all pages are scanned.

If you have already selected a scanner, you do not need to select the scanner unless you want to change it.
The model name of the connected scanner appears in the title bar of the Scanner Control dialog box. If there is more than one scanner of the same model on the network, make sure you have selected the correct scanner. If you have not, click [Selct. Specfd. Scnnr.], and then select the scanner again. If the correct scanner does not appear in the list, check that the scanner is correctly connected to the network and that its IPv4 or IPv6 address has been specified. If the correct scanner still does not appear; in the Network Connection Tool that is installed with the TWAIN driver, select the [Selct. Specfd. Scnnr.] check box, and then specify the IP address or host name of the scanner you want to use. For details, see Network Connection Tool Help.
The Blank Page Detect function is not available when you are using the TWAIN scanner.
When the machine is used as a TWAIN scanner, the screen switches automatically to the initial scanner screen as you use the client computer to scan a document using the TWAIN driver. Press [Exit] to use functions other than TWAIN scanner.
You can place and scan pages in the same vertical size at one time using the ADF. A regular size page is detected automatically.

To detect the page size to scan for each page, select [Auto detect(Mixed-size)] in [Original Size:].
To scan all pages of an original in the same size as the first page, select [Auto detect(Uni-size)] in [Original Size:].

You cannot use the blank page detection function when using the TWAIN scanner.