Basic Procedure for Transmitting Faxes
The machine scans an original to transmit it by fax into the machine's memory before establishing a communication with the destination (Memory Transmission).
You can also transmit a fax while confirming the status of the fax destination.
Sending a Fax While Scanning the Original
You can specify a destination easily by registering the destination in the address book.
Registering/Changing/Deleting Fax Numbers in the Address Book

It is recommended that you call the receivers and confirm with them when sending important documents.
Press [Fax] on the Home screen.
Check that [Fax] and [Memory Transmission] are displayed on the fax screen.
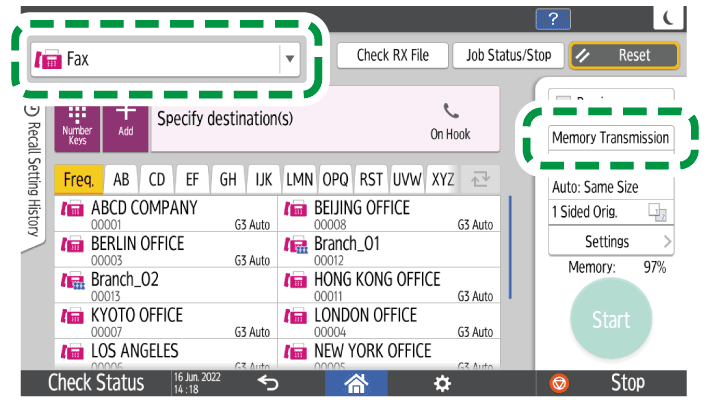
Press an item on the fax screen to select [Memory Transmission] if [Immed. Transmission] is selected.
Place the original in the ADF or on the exposure glass.
Press [Settings], and then specify the scan settings.
Sending a Fax at the Image Quality Suitable for the Original
Specify the destination.
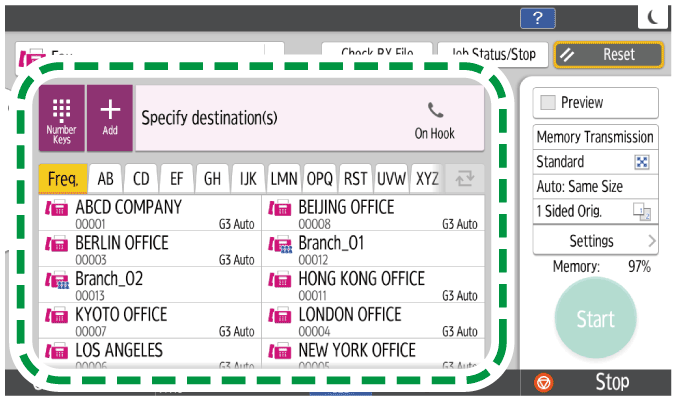
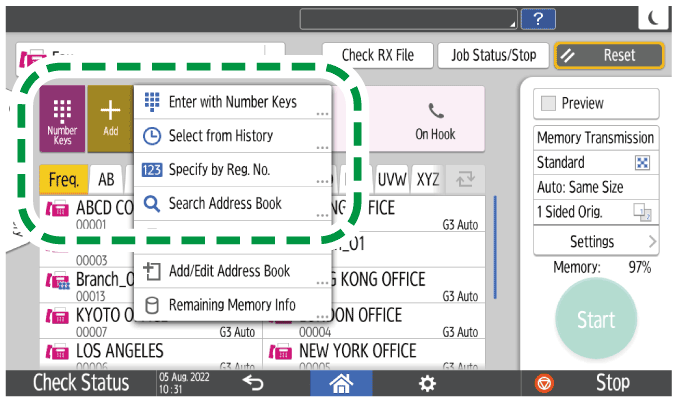
To enter the fax number manually, select the destination from the destination history, or search for the destination in the machine address book and registered LDAP server, press
 , and specify the destination. You can also enter the fax number manually by pressing
  .
.
You can select only the destination entered using the numeric keypad from the history.
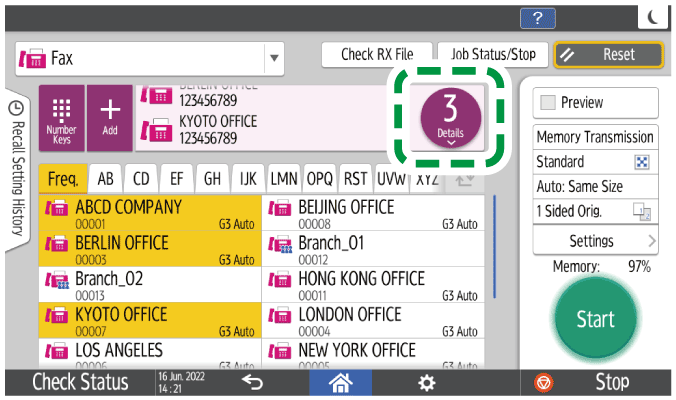
To specify the destination again, press
 .
.
If you want to change the registered contents of the specified destination or register a new destination, press
 and then select [Add/Edit Address Book] to change or newly register the destination on the address book screen.
Registering/Changing/Deleting Fax Numbers in the Address Book
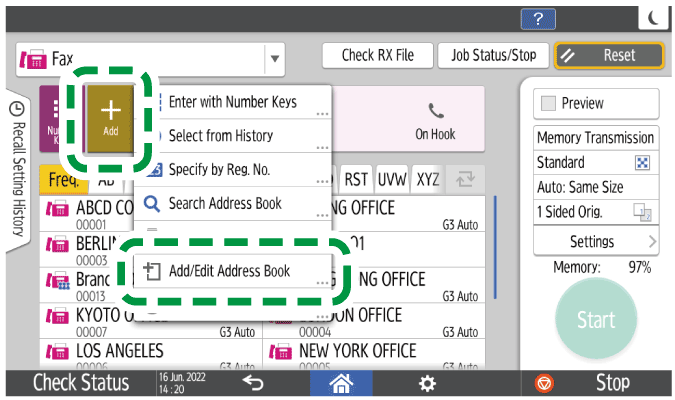
When you select [Add/Edit Address Book], the settings you have made will be reset. Close the address book screen, and then specify the destination again on the fax screen.
On the [Settings] screen, specify [Sender] as necessary.
You can select a sender from the users for which the [Use as Sender] check box was selected when they were being registered to the address book.
Registering/Changing/Deleting E-mail Addresses in the Address Book
When a login user is operating the machine, the login user becomes the sender.
To receive a transmission result by e-mail, select [Notification of Result].
To print the sender's name on the page received at the destination, select [Stamp Sender Name].
Press [Start].
After scanning the originals, you can check and operate the originals waiting to be sent that are stored in the memory until the transmission is complete.Confirming and Handling a Document in the Fax Queue
Press [Job Status/Stop]
 [Transmission Result] to confirm if the fax document was sent correctly.
Confirming the Transmission Result on the Fax Screen

If the telephone line you are connected to requires time to connect to the public line after you dial the external number, enter a [Pause] after entering the number to specify the time to wait before dialing the number. The machine pauses for about two seconds for each single [Pause] entered.
To use tone-dialing in a pulse-dialing environment, press [Tone]. A tone signal is generated for every number you enter afterward.
You can perform immediate transmission only when the total number of destinations specified for all documents exceeds the maximum value.
The communication that has been initiated first is displayed on the screen when performing three simultaneous communications.
When searching for a destination in the machine address book and registered LDAP server, if the search takes too long, you can press [Cancel] to stop the search. Also, if there are too many search results to find the desired destination, you can change the search character string and search again by pressing the character input field on the search result display screen.