Storing Documents to Print in the Machine
You can store a document on the hard disk of the machine and print it from the control panel later.
![]()
You can print only the first set of the stored document as a test and print the rest of the sets from the control panel later.
Making a Partial Print as a Test and Printing the Rest of the Document
Print Mode for Storing Documents
Select a storage type for documents to store in the machine on "Job Type" in the printer driver.
You can print stored documents by using [Quick Print Release] or [Document Server].
Using Quick Print Release
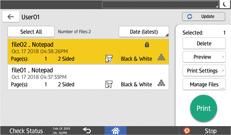
You can view the stored document list for each user ID. You can print your document with a simple procedure.

You can use the following storage types:
Locked Print
Specify a password for the document to store. A password is required to print the document from the control panel, making this suitable for confidential documents.
On machines installed with RICOH Always Current Technology v1.2 or later, you can also enhance security of the data by encrypting the document when storing it from a computer.
Hold Print
Hold Print jobs will be deleted after they are printed. Hold Print is useful when combining and printing multiple documents or when holding a document temporarily in the machine to print later. You can also specify the time to print a stored document.
Stored Print
Stored Print is useful when printing the same document repeatedly, as the document will not be deleted even after the printing has been completed. You can also print a document and store it in the machine at the same time or share a document by giving access privileges to other users.
On machines installed with RICOH Always Current Technology v1.2 or later, you can also enhance security of the data by encrypting the document when storing it from a computer.
Encrypting the Document when Storing It
Documents for Stored Print are automatically deleted after 72 hours (3 days). You can change the period until documents are deleted in the following setting items.
Settings screen type: Standard
[Printer Settings]
 [Data Management/Maintenance]
 [Print Jobs]
 [Auto Delete Stored Print Jobs]
Settings screen type: Classic
[Printer Settings]
 the [Data Management] tab
  [Auto Delete Stored Print Jobs]
Using the Document Server
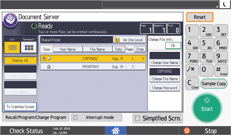
You can view the stored document list for each folder. You can organize documents using folders created to suit your needs. You can also store documents together with the data scanned by the document server function.

You can specify a password for the documents stored in the document server or share them with a user who has sharing privileges.
Specifying Access Privileges for Documents Stored in Document Server
You can view the document in the document server using Web Image Monitor from the computer.
Documents stored in the document server are automatically deleted after 72 hours (3 days). You can change the period until documents are deleted in the following setting items.
Settings screen type: Standard
[System Settings]
 [Settings for Administrator]
 [File Management]
 [Auto Delete File in Document Server]
Settings screen type: Classic
[System Settings]
 the [Administrator Tools] tab
  [Auto Delete File in Document Server]
![]()
Do not cancel sending of data for the Document Server in the middle of the process. The process may not be canceled properly. If you have canceled the process, delete the data on the control panel of the machine again.
There are upper limits for the number of documents and pages that can be stored.
You can confirm the files that have not been stored with the error logs.
Settings screen type: Standard
Settings screen type: Classic
Storing Documents from the Computer (Windows)
Specify the print mode on the [Frequently Used Settings] in the printer driver.
![]() Open a document to print on the computer, and display the setting screen of the printer driver from the print menu in the application.
Open a document to print on the computer, and display the setting screen of the printer driver from the print menu in the application.
![]() Specify Paper Size, Paper Type, Orientation, and other settings.
Specify Paper Size, Paper Type, Orientation, and other settings.
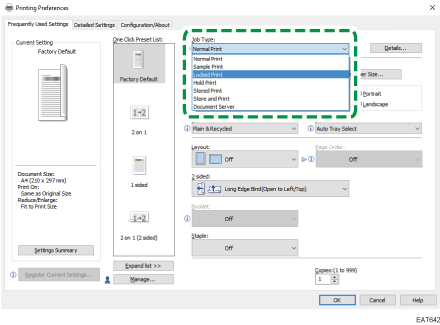
![]() Select a job type and click [Details...].
Select a job type and click [Details...].

Locked Print, Hold Print, and Stored Print
User ID: A user ID is displayed on the control panel to show the owner of the document. Specify whether to enter a user ID or to use the Windows logon name as a user ID.
Enter User ID: Enter a user ID using up to eight single-byte alphanumeric characters.
File Name: As an option, enter a file name to display on the control panel. If you do not enter a file name, a job name is assigned automatically. You can enter a file name when Hold Print or Stored Print is set.
Password: Enter a password to print a document from the control panel. You can specify a password when you set Locked Print or Stored Print. Always specify a password when you set Locked Print. Specifying a password is optional when you set Stored Print.
Set Print Time: As an option, specify the time to print a document when configuring Hold Print.
Document Server
User ID: A user ID is displayed on the control panel to show the owner of the document. Specify whether to enter a user ID or to use the Windows logon name as a user ID.
Enter User ID: Enter a user ID using up to eight single-byte alphanumeric characters.
File Name: As an option, enter the name to display on the control panel. If you do not enter a file name, a name such as "PRINT0001" or "PRINT0002" is assigned automatically.
Password: As an option, enter a password to print a document from the control panel.
User Name: Enter the user name using up to 16 single-byte characters to identify the owner of the document.
Folder Number: Specify the folder number in the document server. When you specify 0, the document will be stored in the shared folder.
Folder Password: If a password is specified to the folder in the document server, enter the password.
![]() After completing the configuration, click [OK].
After completing the configuration, click [OK].
![]() On the application, click the button for printing.
On the application, click the button for printing.
When printing the document specifying [Store and Print], the document will be stored in the machine simultaneously.
To print a document stored in the machine, see the sections below:
Printing Documents Stored in the Printer from the Control Panel
If the time interval between the specified print time and the current time on the machine is a few minutes, the print job may be executed immediately.
Storing Documents from the Computer (OS X/macOS)
Specify the print mode on [Job Log] in the printer driver.
![]() Open a document to print on the computer, and display the setting screen of the printer driver from the print menu in the application.
Open a document to print on the computer, and display the setting screen of the printer driver from the print menu in the application.
![]() Specify Paper Size, Orientation, Paper Type, and other settings.
Specify Paper Size, Orientation, Paper Type, and other settings.
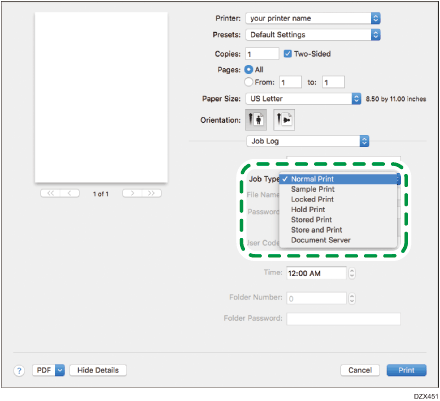
![]() Configure "Job Type".
Configure "Job Type".

Locked Print, Hold Print, and Stored Print
User ID: A user ID is displayed on the control panel to show the owner of the document. Enter the password using up to eight single-byte alphanumeric characters.
File Name: As an option, enter a file name to display on the control panel. If you do not enter a file name, a job name is assigned automatically. You can enter a file name when Hold Print or Stored Print is set.
Password: Enter a password to print a document from the control panel. You can specify a password when you set Locked Print or Stored Print. Always specify a password when you set Locked Print. Specifying a password is optional when you set Stored Print.
Time: As an option, specify the time to print the document when configuring Hold Print.
Document Server
User ID: A user ID is displayed on the control panel to show the owner of the document. Enter the password using up to eight single-byte alphanumeric characters.
File Name: As an option, enter a file name to display on the control panel. If you do not enter a file name, a name such as "PRINT0001" or "PRINT0002" is assigned automatically.
Password: Enter a password to print a document from the control panel.
User Code: Enter a user code using up to eight single-byte letters.
Folder Number: Specify the folder number in the document server. When you specify 0, the document will be stored in the shared folder.
Folder Password: If a password is specified to the folder in the document server, enter the password.
![]() After completing the configuration, click [Print].
After completing the configuration, click [Print].
When printing a document specifying [Store and Print], the document will be stored in the machine simultaneously.
To print a document stored in the machine, see the sections below:
Printing Documents Stored in the Printer from the Control Panel
If the time interval between the specified print time and the current time on the machine is a few minutes, the print job may be executed immediately.
Encrypting the Document when Storing It
You can prevent information leaks by encrypting the document in the printer driver when using Locked Print/Stored Print to print it. The algorithm used for encryption is AES-256.
![]()
This function is available on machines implemented with RICOH Always Current Technology v1.2 or later.
To encrypt the document to store, specify encryption in the printer driver.
![]() Display the "Devices and Printers" screen.
Display the "Devices and Printers" screen.
Windows 10 (version 1703 or later) , Windows Server 2019
On the [Start] menu, click [Windows System]
 [Control Panel].
Click [View devices and printers].
Windows 10 (before version 1703), Windows Server 2016
Right-click [Start], and then click [Control Panel].
Click [View devices and printers].
Windows 8.1, Windows Server 2012/2012 R2
On the Charm Bar, click [Settings]
 [Control Panel].
Click [View devices and printers].
Windows 7, Windows Server 2008 R2
On the [Start] menu, click [Devices and Printers].
Windows Server 2008
On the [Start] menu, click [Control Panel].
Select [Printer] on [Hardware and Sound].
![]() Right-click the printer icon, and then click [Printer properties].
Right-click the printer icon, and then click [Printer properties].
![]() Click [Advanced Options], and click [Security Settings...].
Click [Advanced Options], and click [Security Settings...].
![]() Select the [Encrypt Data for Locked Print, Stored Print, and Stored Print (Shared)] check box.
Select the [Encrypt Data for Locked Print, Stored Print, and Stored Print (Shared)] check box.

You can also specify whether to continue or cancel printing when no password is specified.
![]() Click [OK].
Click [OK].
![]() After completing the configuration, close the setting screen of the printer driver.
After completing the configuration, close the setting screen of the printer driver.
![]() Perform Locked Print or Stored Print.
Perform Locked Print or Stored Print.
