Reducing or Enlarging Originals
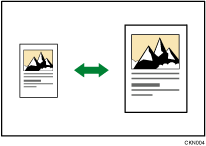
This section describes methods of reducing or enlarging images by specifying a reproduction ratio, or a paper size.
Base Point
The base point of reduce/enlarge differs depending on how the original is scanned. When the original is placed on the exposure glass, the upper left corner will be the base point. When it is placed in the ADF, the bottom left corner will be the base point.
Placing the original on the exposure glass

Placing the original in the ADF

In addition to the functions described in this section, advanced reduce/enlarge copy functions are also available. For details about these functions, see Advanced Reduce/Enlarge Copying.

The reproduction ratio is between 25 and 400%.
You can select the ratio with priority when [Reduce / Enlarge] is pressed. For details, see the following section:
Preset Reduce / Enlarge
This function allows you to reduce or enlarge images by selecting a preset ratio.
You can register up to three frequently used reproduction ratios other than the preset reduce/enlarge ratios.
 Press [Reduce / Enlarge].
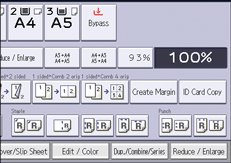
 Select a ratio, and then press [OK].
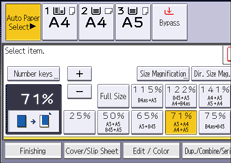
 Place the originals, and then press [Start].

You can select a ratio regardless of the size of an original or copy paper. With some ratios, parts of the image might not be copied or margins will appear on copies.
For details about the base point, see Reducing or Enlarging Originals.
You can change reproduction ratios shown on the initial screen under [Copy Ratio Priority Setting] in Settings. For details, see the following section:
Zoom
You can specify the reproduction ratio in increments of 1%.
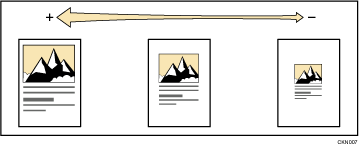
To specify a reproduction ratio, enter the ratio using the number keys or specify the ratio with [![]() ] or [
] or [![]() ].
].
This section describes how to enter the ratio using the number keys.
 Press [Reduce / Enlarge].

 Press [Number keys].
 Enter the desired ratio with the number keys, and then press [
![]() ].
].
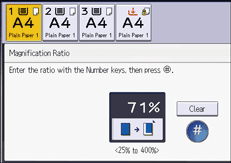
When specifying the ratio with [![]() ] or [
] or [![]() ], press [Reduce / Enlarge], and then select a preset ratio which is close to the desired ratio. Pressing [
], press [Reduce / Enlarge], and then select a preset ratio which is close to the desired ratio. Pressing [![]() ] or [
] or [![]() ] changes the ratio in increments of 1%.
] changes the ratio in increments of 1%.
Pressing and holding down [![]() ] or [
] or [![]() ] changes it in increments of 10%.
] changes it in increments of 10%.
 Press [OK] twice.
 Place the originals, and then press [Start].

You can select a ratio regardless of the size of an original or copy paper. With some ratios, parts of the image might not be copied or margins will appear on copies.
For details about the base point, see Reducing or Enlarging Originals.
Auto Reduce / Enlarge
The machine automatically calculates the reproduction ratio based on the sizes of the originals and the paper you have specified. The machine will rotate, enlarge, or reduce the image of the originals to fit them to the paper.
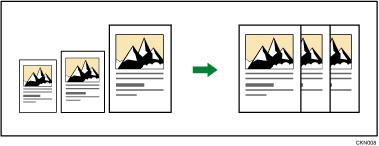

If you select a reproduction ratio after pressing [Auto Reduce / Enlarge], [Auto Reduce / Enlarge] is canceled.
This is useful to copy different size originals to the same size paper.
If the orientation in which your original is placed is different from that of the paper you are copying onto, the machine rotates the original image by 90 degrees and fits it on the copy paper (Rotate Copy). For example, to reduce A3 (11 × 17)![]() originals to fit onto A4 (81/2 × 11)
originals to fit onto A4 (81/2 × 11)![]() paper, select a paper tray containing A4 (81/2 × 11)
paper, select a paper tray containing A4 (81/2 × 11)![]() paper, and then press [Auto Reduce / Enlarge]. The image is automatically rotated. For details about Rotate Copy, see Rotate Copy.
paper, and then press [Auto Reduce / Enlarge]. The image is automatically rotated. For details about Rotate Copy, see Rotate Copy.
 (mainly Europe and Asia)
Original location | Original size and orientation |
|---|---|
Exposure glass | A3 |
ADF | A3 |
 (mainly North America)
Original location | Original size and orientation |
|---|---|
Exposure glass | 11 × 17 |
ADF | 11 × 17 |
*1 You can switch the initial setting to determine whether the machine detects either 81/2 × 14![]() or 81/2 × 132/5
or 81/2 × 132/5![]() .
.
 Press [Auto Reduce / Enlarge].
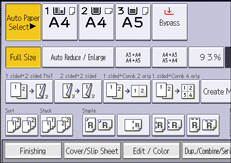
 Select the paper tray.
 Place the originals, and then press [Start].

For details about the base point, see Reducing or Enlarging Originals.
