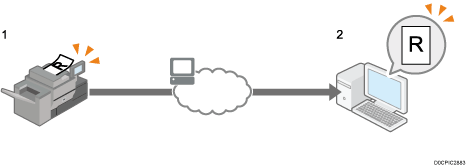
Basic Operating Procedure of WSD Scanner (Push Type)
This section explains how to send scanned documents to a client computer through a network.

If the message “Updating the destination list has failed. Try again?” appears, press [OK]. The destination list will then be updated.
 On the Home screen, press [Scanner (Classic)].
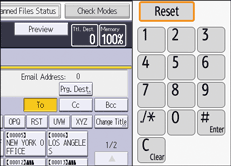
 Make sure that no previous settings remain.
If a previous setting remains, press [Reset].
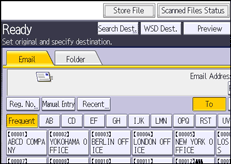
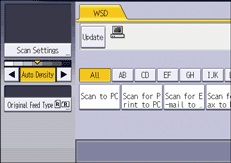
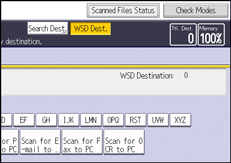
 Press [WSD Dest.].
 Place originals.
 If necessary, specify the scan settings according to the original to be scanned.
These include the [Erase Center / Border] settings under [Scan Settings], adjusting image, and the [Original Orientation] settings under [Original Feed Type].
Specify other scan conditions using the client computer.
 Specify the destination.
 Press [Start].

You cannot preview scanned images. After pressing [Start], you can view the scanned images on your computer.
After you press [Start], the client computer might time out and display the error message "Automatic Scanning could not be completed". The cause of this message is likely to be one of the following:
Scan processing is taking a long time.
The machine will send the scan files again; please wait. Depending on the client computer's settings, you might have to perform a procedure on the client computer directly.
The operating system might not support WSD (Push Type) features.
If the message appears every time you scan an original, it is possible that WSD (Push Type) features cannot be used. Use WSD (Pull Type) for scanning.
To cancel scanning, press [Stop]. You cannot cancel scanning from a client computer.
You cannot use WSD to send files stored on the machine.
You cannot scan originals while other originals are being scanned.
Two-sided originals are scanned for sideways opening (top-to-top orientation).
If scanning does not begin after you press [Start], the machine might not be registered to the computer or the profile might be incorrectly configured.
After scan files are sent, their destination settings are automatically cleared. If you want to preserve this information, contact your local dealer for details.
You cannot switch the screen while e-mail or other destinations are being specified. To clear the specified destination, display the destination in the destination field of each screen, and then press [Clear].
Selecting a destination client computer from the destination list
Use the following procedure to select a destination client computer from the destination list.
Destinations appear in the destination list after you log in to your computer.
If a WSD-compatible computer is connected to the network, the following five destinations appear on the display panel automatically. For details about the saving location of files in each destination, see the relevant computer's settings.
Scan to "Computer Name"
Scan for Print to "Computer Name"
Scan for E-mail to "Computer Name"
Scan for Fax to "Computer Name"
Scan for OCR to "Computer Name" (Scan for OCR to "Computer Name" might not be available depending on the destination client computer.)
If the destination computer does not appear but the machine is already registered to the destination computer, press [Update]. This will update the destination list with the latest information.
In the destination list, press the destination computer that you want to send to.

In the destination list, each destination client computer is displayed using up to 20 characters. If the number of characters exceeds 21, "..." is displayed at and after the 20th character position.
We recommend you register easily recognizable computer names.
You can also search for the destination by pressing [Search Dest.].
The destination list can display up to 250 client computer destinations.
Searching for a destination client computer
Use the following procedure to search for a destination client computer and select it.
Press [Search Dest.].
Press [Name].
You can specify up to three character strings when searching a destination by its name. The third string can be specified by pressing [Advanced Search].
Enter the search characters, and then press [OK].
If necessary, press [Advanced Search] to specify the detailed search criteria, and then press [OK].
By pressing [Advanced Search], you can search by [Name]. You can specify search criteria such as [Beginning Word] or [End Word]. You can refine your search using multiple criteria.
Press [Start Search].
Select a destination, and then press [OK].
Search targets are computer names.
Up to 100 destinations can be displayed as search results.