Confirming the Reception of an Internet Fax at the Destination
Specify [Reception Notice] when sending an Internet Fax to check that the fax is received correctly at the destination in Records.
![]()
You can use this function when the destination device supports MDN (Message Disposition Notification).
Specifying [Reception Notice] When Sending an Internet Fax
![]() Press [Fax] on the Home screen.
Press [Fax] on the Home screen.
![]() Select [Internet Fax] on the fax screen.
Select [Internet Fax] on the fax screen.
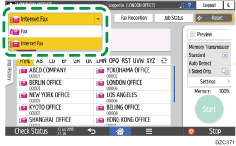
![]() Place the original in the Auto Document Feeder (ADF) or on the exposure glass.
Place the original in the Auto Document Feeder (ADF) or on the exposure glass.
![]() Press [Settings]
Press [Settings] [Sender] on the fax screen to specify the sender.
When a login user is operating the machine, the login user becomes the sender.
![]() Select the [Notification of Result] check box.
Select the [Notification of Result] check box.
![]() Select the [Reception Notice] check box.
Select the [Reception Notice] check box.

![]() Configure the scan settings.
Configure the scan settings.
Sending a Fax at the Image Quality Suitable for the Original
![]() Specify the destination on the fax screen, and then press [Start].
Specify the destination on the fax screen, and then press [Start].
![]()
You cannot send an Internet Fax or e-mail to multiple destinations when using reception confirmation. An individual e-mail is sent per destination in the specified order.
Checking the Reception Result in Records
Browse Records to check if an outgoing Internet Fax specified with [Reception Notice] was received at the destination.
![]() Press [Fax] on the Home screen.
Press [Fax] on the Home screen.
![]() Press [Job Status] on the fax screen.
Press [Job Status] on the fax screen.
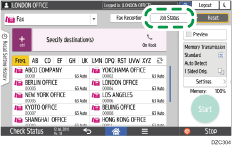
![]() Press [Print Records], and then select the printing method.
Press [Print Records], and then select the printing method.
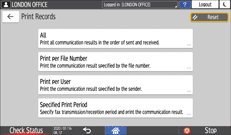
To print the latest 50 records
Press [All], and then press [Print]. To check the transmission and reception history prior to the latest 50 results, check the Records that have been printed automatically or use [Print per File Number], [Print per User], or [Specified Print Period]. The machine stores up to 1,000 of the latest transmission and reception results.
To specify the document number to print its transmission result
Press [Print per File Number], enter the 4-digit document number, and then press [Print].
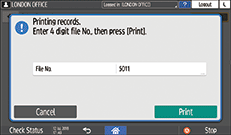
To specify an user to print its transmission result
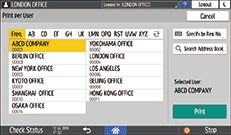
Press [Print per User], specify the user to print the transmission/reception result, and then press [Print]. Prints the transmission and reception results for the specified user from among 1,000 of the latest results.
![]() Check the reception result at the destination.
Check the reception result at the destination.
"OK" is displayed in the "Result" column of Records when the machine receives a reception confirmation e-mail notifying the successful reception from the destination. "Error is displayed in the column when the machine receives a reception confirmation e-mail notifying that a reception error occurred.
"--" is displayed in the "Result" column of Records when a reception confirmation e-mail cannot be received for the latest 50 communications.
![]()
When the machine receives the reception confirmation e-mail that notifies that an error has occurred, an e-mail containing the information about the sender and the cause of the error written in English is printed on the machine.
You can also configure the machine to print the reception confirmation e-mail upon successfully completing a reception.
Select bit number [0] under switch number [21], and change current value to "1".
Do not specify reception confirmation when the destination is a mailing list. If you do so, you will receive reception confirmation e-mails from multiple destinations. In this case, "Error" will be displayed when even one reception error occurs.
