Specifying an E-Mail Destination
Specify an e-mail address of the destination.
You can also enter the e-mail address of another machine that supports Internet Fax. Note however that only TIFF-F files can be sent by Internet Fax. Depending on the model of the destination machine, PDF files might not be accepted.

When the [Restrict Adding of User Destinations (Fax)] setting is enabled, you cannot enter email addresses directly with the keyboard.
Preventing Information Leaks by Sending Data to a Wrong Destination
Press [Fax] on the Home screen.
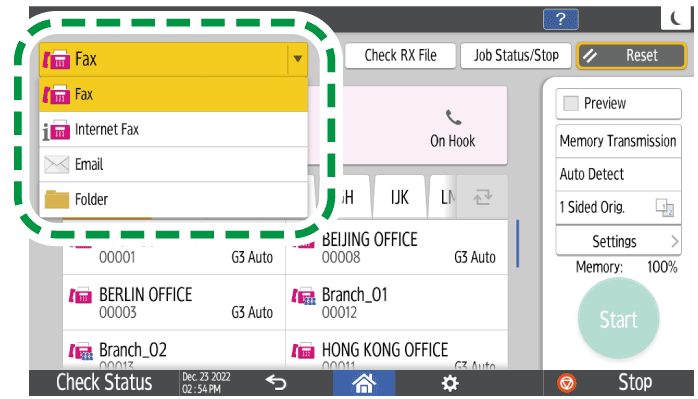
Select [Email] on the fax screen.
Place the original in the Auto Document Feeder (ADF) or on the exposure glass.
Setting an Original to Send by Fax on the ScannerPress [Settings]
 [Sender] to specify the sender.
 When a login user is operating the machine, the login user becomes the sender.
To receive a transmission result by e-mail, select [Notification of Result]. The email address that you selected the [Use as Sender] check box when registering the address will be used as the e-mail address of the sender.
Registering/Changing/Deleting E-mail Addresses in the Address BookTo print the sender name on the page received at the destination, select the [Stamp Sender Name] check box.
To specify the subject, enter Subject.
If you do not specify the subject, it is entered automatically.
For the maximum number of characters for an e-mail subject, see List of Maximum Values for Each Setting Item.To specify the main text, select "Text".
Select the main text to use from the text registered in [Register/Change/Delete Email Message] under [System Settings] in advance.
Send (Email/Folder)Configure the scan settings.
Sending a Fax at the Image Quality Suitable for the Original
Specify TIFF as the file format when sending to an e-mail address of a machine that supports Internet Fax.Press
 to select [Enter Using Keyboard] and enter the destination.
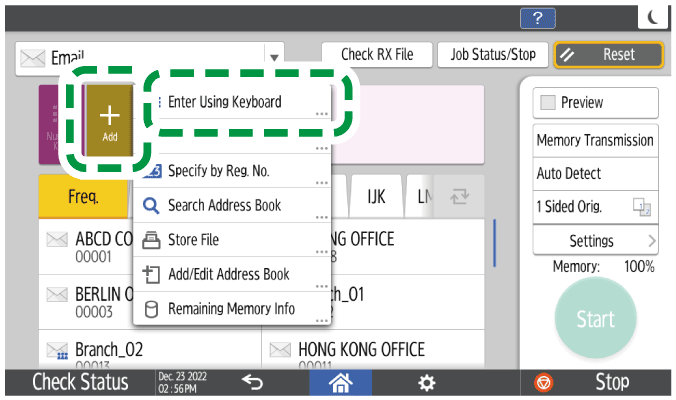
To specify the destination again, press
 .
.
To cancel the specified destination (deleting from the specified destination), press the destination of the selected address.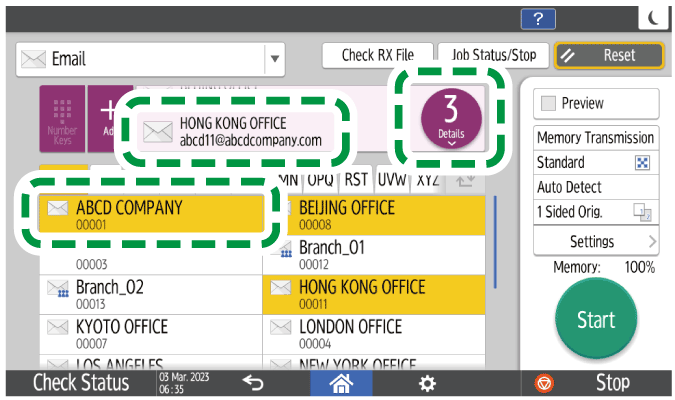
Enter the destination.
Press [Start].
After scanning the originals, you can check and operate the originals waiting to be sent that are stored in the memory until the transmission is complete.
Confirming and Handling a Document in the Fax Queue

You cannot send an e-mail without attaching a document to send.
If you specify [Bcc Transmission] when sending e-mail, then you can send the fax to all e-mail addresses without disclosing the other recipients.
Press [Fax] on the Home screen.
Select [Email] on the fax screen.
Place the original in the Auto Document Feeder (ADF) or on the exposure glass.
Setting an Original to Send by Fax on the ScannerSelect [Settings]
[Bcc Transmission] check box.
Press [Sender] to specify the sender.
When a login user is operating the machine, the login user becomes the sender.Configure the scan settings.
Sending a Fax at the Image Quality Suitable for the OriginalSpecify the e-mail destination, and then press [Start].
Press [Fax] on the Home screen.
Select [Email] on the fax screen.
Place the original in the Auto Document Feeder (ADF) or on the exposure glass.
Setting an Original to Send by Fax on the ScannerPress [Settings]
[Sender] on the fax screen to specify the sender.
When a login user is operating the machine, the login user becomes the sender.Select the [Reception Notice] check box.

Configure the scan settings.
Sending a Fax at the Image Quality Suitable for the OriginalSpecify the e-mail destination, and then press [Start].
You cannot send an e-mail to multiple destinations when using reception confirmation. An individual e-mail is sent per destination in the specified order.