Guide to Names and Functions of Components

- Do not obstruct the machine's vents. Doing so can result in fire as the internal components are overheated.
ADF stands for Auto Document Feeder.
Front and Left View
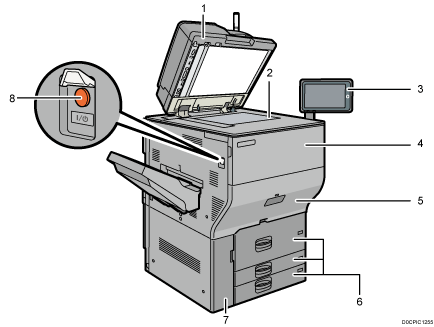
Auto Document Feeder (ADF)
Lower the ADF over originals placed on the exposure glass.
If you load a stack of originals in the ADF, the ADF will automatically feed the originals one by one.
The ADF scans both sides of an original simultaneously.
Exposure glass
Place originals face down here.
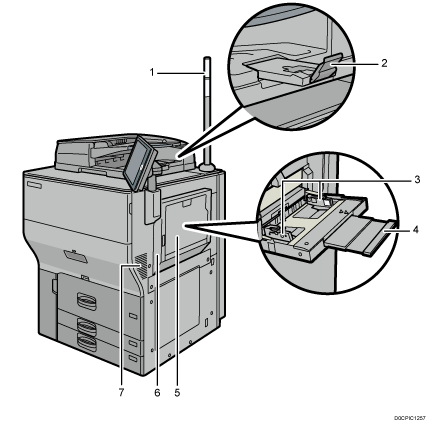
Control panel
Front cover
Open to replace the toner cartridge.
Drawer
Pull out the drawer when a paper jam occurs.
Paper trays (Trays 1–3)
Load paper here. Tray 1 is a tandem tray where paper on the left side automatically moves to the right when paper there has run out.
Lower front cover
Open to change the waste toner bottle.
Main power switch
To turn the power on and off, open the cover of the main power switch and press the main power switch.
Front and Right View
Attention light
ADF's extender
Pull this extender to support large paper.
Paper guides
When loading paper in the bypass tray, align the paper guides flush against the paper.
Extender
Pull this extender out when loading sheets larger than A4
 , 81/2 × 11 in the bypass tray.
Bypass tray
Use to copy or print on transparencies, adhesive labels, translucent paper, and paper that cannot be loaded in the paper trays.
Upper right cover
Open this cover when a paper jam occurs.
Vents
Prevent overheating.
After large-volume printing, the ventilation fan may continue to work to lower the temperature inside the machine.
Rear and Left View
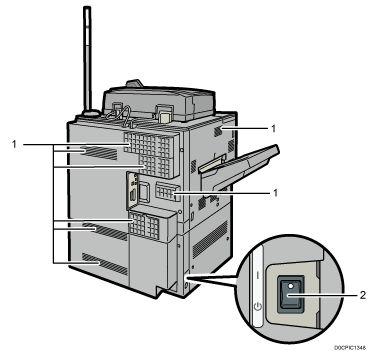
Vents
Prevent overheating.
After large-volume printing, the ventilation fan may continue to work to lower the temperature inside the machine.
Anti-humidity heater switch
Prevents trays from absorbing moisture. If humidity is high and temperature is low, turn this switch on to have moisture from the paper trays absorbed and prevent the print quality from deteriorating.
Guide to Functions of the Attention Light
- Do not push or pull the attention light when installed to the machine. Doing so may result in damage or malfunction of the attention light or the machine.
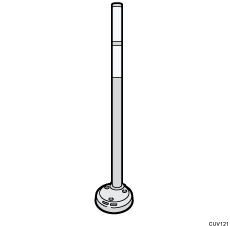
The attention light notifies the user by light when there is a paper jam or no paper is left.
The colors of the lamp and their meanings are as follows:
Lamp | Status |
|---|---|
The bottom lamp lights blue. | Printing |
The bottom lamp flashes blue. |
|
The top lamp lights red. | Error occurred (Example)
Read the message on the display panel, and then take appropriate action. |
The top lamp flashes yellow. | Warning (Example)
Read the message on the display panel, and then take appropriate action. |