Placing an Original on the Scanner
Place an original to copy, and specify Original Orientation according to the original.
To copy both sides of the paper, to staple, or to punch holes, confirm the orientation of the original according to how you want the printout to appear.
Basic Original Orientation
Place | Orientation | |
|---|---|---|
Exposure Glass | Place the original face down in a readable orientation. |  |
ADF | Place the original face up in a readable orientation. |  |
If the Readable Orientation Is Not Vertical
When you copy a portrait original larger than A4 or 8 1/2" × 11" (LT) (A3 or 11" × 17"), place it as shown below, and then specify [Original Orientation].
Place | Orientation | |
|---|---|---|
Exposure Glass | Rotate the original clockwise or counter-clockwise 90 degrees and place it face down. |  |
ADF | Rotate the original clockwise or counter-clockwise 90 degrees and place it face up. |  |
When Specifying [Top 2] as the Staple or Punch Position
Place an original as shown below, and then specify [Original Orientation].
Place | Orientation | |
|---|---|---|
Exposure glass | Place the original face down in a readable orientation. |  |
Auto document feeder (ADF) | Place the original face up in a readable orientation. |  |
 Press the [Copier (Classic)] icon on the [Home] screen.

 Place the original.
 Press [Original Setting].
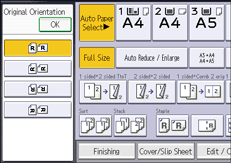
 Press [Original Orientation].
 Specify the Original Orientation.

 Press [OK] twice.
Function Compatibility
Some functions cannot be used at the same time. The order in which these functions are selected determines which functions are valid.
For details about functions that cannot be used at the same time, see Function Compatibility.
Interrupt Copy
Use this function if you want to interrupt a long copy job to make urgently needed copies.

You cannot use the Interrupt Copy function when fax originals are being scanned.
 Press [Interrupt mode].
 Remove the originals that were being copied.
 Place the originals you want to copy.
 Press [Start].
The machine starts making copies.
 When copying is complete, remove the originals and copies.
 Press [Interrupt mode].
 Replace the originals that you were copying, and then press [Start].
Follow the instructions on the screen.
The previous copy job settings are restored. Simply press [Start] to continue copying from where it left off.
Auto Start
If you make settings and scan originals while the machine is busy, your copies will be made once the machine is ready.
 Make your settings while “Select copy mode and press the Start key.” and “Scanning originals can be started.” are displayed alternately.
 Place the original.
 Press [Start].
The machine scans the original.
[Start] flashes when scanning the originals is complete.
Copying starts automatically once the machine is ready.
Job Preset
You can make settings for the next copy job during copying.
You can preset up to eight jobs each for the Classic Copier function and the Document Server function. When the current copy job is finished, the next job will start automatically.
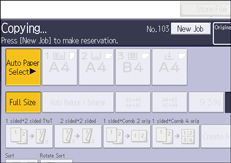
 Press [New Job] when “Copying...” appears.

 Be sure message “Ready” appears, and then make settings for the next copy job.
 Place the originals, and then press [Start].
All originals are scanned.
When the preset job is complete, a job preset confirmation dialog box appears.
 Press [Exit].
After the current copy job, the next copy job starts automatically.

You can switch the screen to the current copy job by pressing [To Copying Screen]. You can switch the screen to the preset job by pressing [To Reserv. Screen].
Preset copy jobs are registered under job numbers in the reservation screen.
You can confirm and delete preset jobs. For details, see the following section:
