Installing the Printer Driver for USB Connection (OS X/macOS)
Install the PPD file (printer driver) under OS X/macOS, and then register the machine on the computer from the system preferences.
Installing the PPD file
 Set the CD-ROM in the computer, and click [macOS] to display the [macOS PPD Installer] folder.
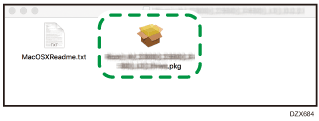
To install the driver from the downloaded file, display the folder that is the location of the downloaded file.
 Double-click the package file.
To install from the CD-ROM, double-click the package file in the [macOS]
 [macOS PPD Installer] folder.
When the install confirmation screen is displayed, click [Continue].
 On the "Introduction" screen, click [Continue].
 On the "License" screen, click [Continue] and then click [Accept].
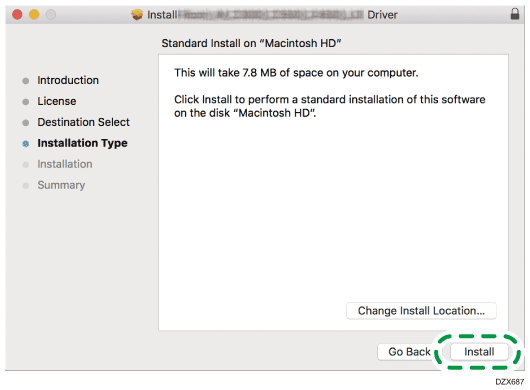
When prompted to select where to install the driver, specify the install location, and click [Continue].
 Click [Install].
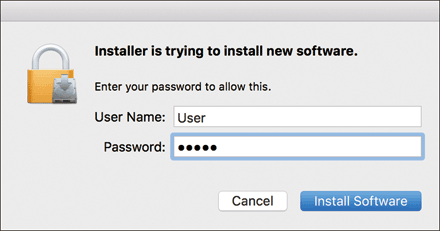
 Enter the user name and password, and then click [Install Software].
The installation of the PPD file starts.
 When the installation is complete, click [Close].
Registering the Machine in [Print & Scan] or [Printers & Scanners]
Register the PPD file of the machine in the system preferences to enable printing.
Connect the machine and the computer with the USB cable.
Select [System Preferences...] from the Apple menu.
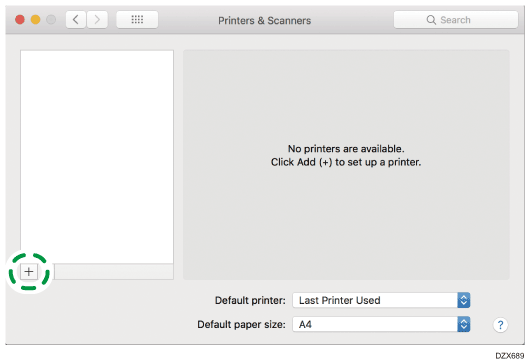
Click [Print & Scan] or [Printers & Scanners].
Click [+].
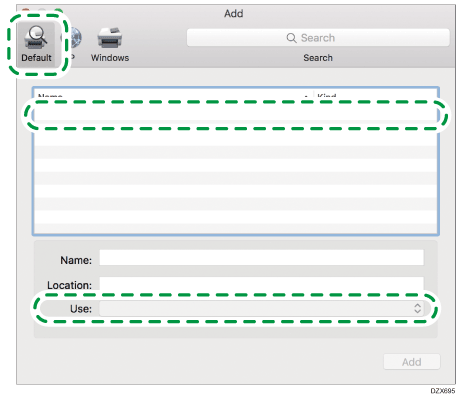
Click [Default] and select the machine from the list, and check that the machine name is displayed in "Use".
When "Generic PostScript Printer" is displayed
Check the USB cable is connected correctly, and then register again.
Click [Add].
The progress screen is displayed.
If the progress screen does not close after a while, click [Configure...] or [Settings] and configure the option configuration of the printer. For the procedure of the option configuration, see Specifying the Option Settings.
Check that the machine name is added to the [Print & Scan] or [Printers & Scanners] screen.

 Close the system preferences screen.
Specifying the Option Settings
Select the option installed on the machine in [Print & Scan] or [Printers & Scanners].
Select [System Preferences...] from the Apple menu.
Click [Print & Scan] or [Printers & Scanners].
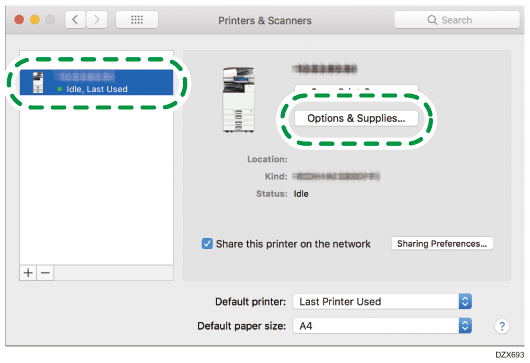
Select the machine from the list, and then click [Options & Supplies...].
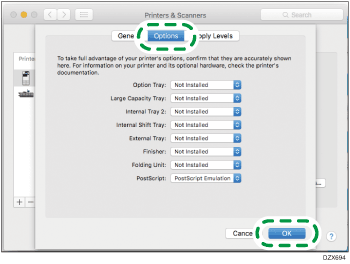
Click [Driver] or [Options], select the option installed on the machine, and then click [OK].
If the usable options are not displayed, the PPD file has not been registered properly. For details about the procedure to register the PPD file, see Registering the Machine in [Print & Scan] or [Printers & Scanners].
Close the system preferences screen.