Placing an Original on the Scanner
Place an original to copy, and specify [Original Orientation] according to the original.
To copy both sides of the paper, to staple, or to punch holes, confirm the orientation of the original according to how you want the printout to appear.
Basic Original Orientation
Place | Orientation | |
|---|---|---|
Exposure Glass | Place the original face down in a readable orientation. | 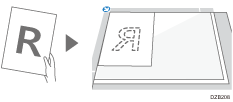 |
ADF | Place the original face up in a readable orientation. | 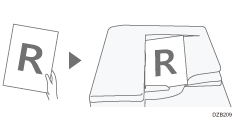 |
If the Readable Orientation Is Not Vertical
When you copy a portrait original larger than A4 or 8 1/2" × 11" (LT) (A3 or 11" × 17"), place it as shown below, and then specify [Original Orientation].
Place | Orientation | |
|---|---|---|
Exposure Glass | Rotate the original clockwise or counter-clockwise 90 degrees and place it face down. | 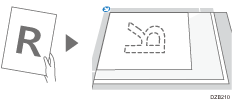 |
ADF | Rotate the original clockwise or counter-clockwise 90 degrees and place it face up. | 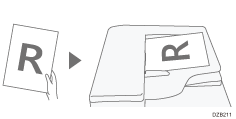 |
When Specifying [Top 2] as the Staple or Punch Position
Place an original as shown below, and then specify [Original Orientation].
Place | Orientation | |
|---|---|---|
Exposure glass | Place the original face down in a readable orientation. |  |
Auto document feeder (ADF) | Place the original face up in a readable orientation. |  |
 Press [Copy] on the Home screen.
 Place the original.
 Press [Original Orientation] on the Copy screen.

If the key is not displayed, select it from [Original Settings].
When you place the original face up in a readable orientation, this setting is not necessary if [Readable Direction] is displayed on the key. Placing of the original is completed.
 Specify the Original Orientation.
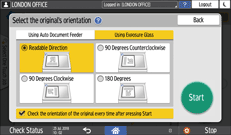
If the display of this screen is not necessary when you press [Start], clear the check box.
Placing of the original is completed.

When an original whose size cannot be detected, specify the original size.
