Unifying the Finished Sizes When Scanning Originals of Various Sizes
When scanning an original comprising pages of different sizes together, you can configure the machine to reduce or enlarge the scanned images automatically to unify the finished sizes.

If the aspect ratios of the original and finishing size do not match, blank areas may appear on the edges of the scanned data.
 Press [Scanner] on the Home screen.
 Place the original on the scanner.
 Press [Send Settings]
 [Scan Ratio] on the scanner screen.

 Specify the finished size of the scanned data.
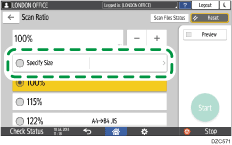
To unify the image sizes in a standard size
Press [Specify Size] and specify the finishing size.

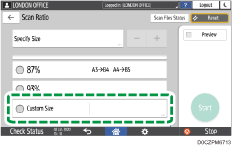
To unify the image sizes in a custom size
Press [Custom Size].

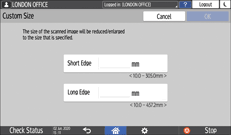
Specify the size by entering the length of the long and short edges separately.

 After specify the finished size of the scanned data, press [OK].
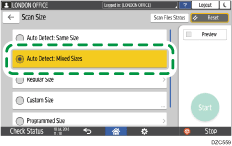
 Press [Scan Size] in [Send Settings], and then select [Auto Detect: Mixed Sizes].

 Specify the scan settings according to the purpose of the scanned data.
Scanning an Original with Suitable Quality and Density
Specifying the File Type or File Name When Scanning a Document
 To send the scanned document to an e-mail address, press [Sender] and then specify the sender.
 Specify the destination on the scanner screen, and press [Start].

When using this function, you cannot select [High Compression PDF] in [File Type].
