Applying Security Settings to an E-mail When Sending a Scanned Document
Encrypt the message and attachment file or attach a signature to the e-mail to prevent spoofed e-mails and information leaks.
Specify the method for applying encryption and attaching a signature using Web Image Monitor.

To use encryption or signature, install the certificate and configure S/MIME on the machine.
Specifying Encryption in Web Image Monitor
Specify whether to encrypt e-mails sent in all functions, or specify encryption for each function. You can specify this setting per destination.
 Log in to Web Image Monitor as the administrator.
 Click [Address Book] from the [Device Management] menu.
 Specify the destination to which to specify the encryption method and then click [Detail Input]
 [Change].
 In [Encryption], select whether to specify encryption per function or encrypt documents sent in all functions.
Set Individually
You can select whether to apply encryption each time you send a scanned document by e-mail.
Encrypt All
All e-mails sent to this destination are encrypted upon transmission regardless of the settings specified when sending the e-mail. When [Encrypt All] is specified, a key mark (
 ) is displayed on the destination key while selecting a destination in the address book.
 Click [OK], and then close the Web browser.
Specifying the Signature in Web Image Monitor
Specify whether to attach a signature to an e-mail or to allow specifying attachment of a signature each time you send an e-mail.
 Log in to Web Image Monitor as the administrator.
 Click [Configuration] from the [Device Management] menu.
 Click [S/MIME] in [Security].
 Select whether to attach a signature to e-mails in [When Sending Email by Scanner].
Use Signatures
Signatures are attached to all e-mails sent from the scanner function.
Do not Use Signatures
Signatures are not attached to any e-mails sent from the scanner function.
Set Individually
You can select whether to attach a signature each time you send a scanned document by e-mail.
 Click [OK], and then close the Web browser.
Applying Encryption/Attaching a Signature When Sending an E-mail
 Press [Scanner] on the Home screen.
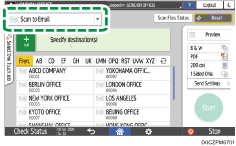
 Select [Scan to Email] on the scanner screen.

 Place the original on the scanner.
 Press [Send Settings] on the scanner screen.

 Press [Sender] and specify the sender.
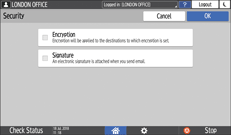
 Press [Security] and configure [Encryption], [Signature] and other related settings.

 Specify the scan settings according to the purpose of the scanned data.
Scanning an Original with Suitable Quality and Density
Specifying the File Type or File Name When Scanning a Document
 Specify the destination on the scanner screen.
When encryption is enabled, specify a destination marked with  (encryption individually specifiable per message).
E-mails sent to a destination marked with
 are encrypted at all times.
When you specify an unmarked destination to send an e-mail, the e-mail sent to the destination will not be encrypted even when encryption is enabled.
 Press [Start].

When you send a URL link to a scanned document instead of attaching the document to the e-mail, only the e-mail message is encrypted. The document stored in the machine is not encrypted.
Storing the Scanned Document in the Machine and Sending the URL by E-mail
The size of an e-mail increases when encryption is specified.
Applying security to e-mail may reduce transmission speed.
If a certificate has expired while transferring e-mail from the server to a destination, the destination might not be able to receive the e-mail.
Note that the following can result if certain signature settings are specified by the administrator:
[Signature] does not appear. This is because you cannot apply signatures to scan files that are sent by e-mail.
You cannot change the [Signature] settings. This is because a signature is always applied to scan files that are sent by e-mail.
