Stapling Printed Pages
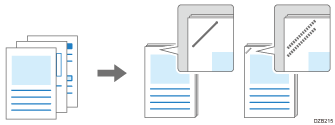
The machine can staple printed sheets set by set. Stapleless Stapler, which presses the printed sheets to bind without stapling, is enabled depending on the finisher attached to the machine.

For details about the paper size and number of sheets that can be stapled, see the following sections:

The optional finisher is required to use this function.

The machine cannot staple the printed sheets fed from the bypass tray.
When the Finisher is attached to the machine, the printed sheets are output to Finisher Shift Tray regardless of the setting of the output tray.
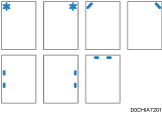
Staple Position and Result
Paper orientation | Result |
|---|---|
Portrait |  |
Landscape |  |
The staple position you can specify varies depending on the finisher.
You cannot specify a staple position supported by the finisher from the printer driver depending on the combination of the paper orientation loaded in the machine and document orientation (portrait or landscape). In this case, change the paper orientation (portrait or landscape) of the paper tray, and then specify the staple position.
When you specify 2-sided print, match the binding side of 2-sided print to the staple position.
When you specify Punch together with Staple, match the punching side to the staple position.

You cannot specify some of the functions, such as Fold or Slip Sheet, together with Staple. The specified staple may be automatically canceled depending on the function. Specify the staple setting again after checking the staple position displayed on the preview icon.
When printing on letterhead paper that has top and bottom, Staple is canceled if the print orientation and the staple position do not match.
When the staples are finished while the error skip is enabled, the message appears. Cancel Staple to continue printing without stapling.
When [Printer Settings]
 [Data Management/Maintenance]
 [Administrator Tools]
 [Stapleless Stapler and Staple Display Setting] is set to [Stapleless Only Available], the printed sheets are finished with Top Left or Top Right of Stapleless regardless of the setting in the printer driver.
Stapling the Printed Sheets (Windows)
Configure the settings on [Staple] of the [Basic] or [Finishing] tab.
 Open a document to print on the computer, and display the setting screen of the printer driver from the print menu in the application.
 Specify Paper Size, Paper Type, Orientation and other settings.
Basic Procedure for Printing Documents
Be sure to specify "Original Size" and "Original Orientation".
 In [Staple:] on the [Basic] or [Finishing] tab, select a position for staples.
You can check the staple position by the preview icon displayed on "Current Setting" after specifying Staple.
 After completing the configuration, click [OK] to print.
Stapling the Printed Sheets (macOS)
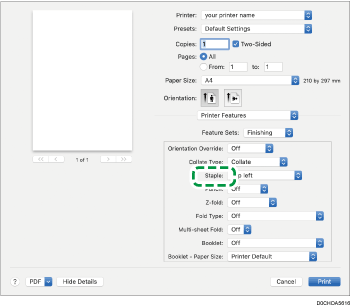
Configure the settings in [Finishing] on "Feature Sets" of [Printer Features].
 Open a document to print on the computer, and display the setting screen of the printer driver from the print menu in the application.
 Specify Paper Size, Orientation, Paper Type, and other settings.
Basic Procedure for Printing Documents
Be sure to specify "Paper Size" and "Orientation".
 From "Staple" in [Finishing] of "Feature Sets", select the staple position.

 After completing the configuration, click [Print] to print.
