Enhanced Copier Functions
Following functions of [Copier (Classic)] are now available in [Copy].
Function |
Before updating to version 1.1 |
Version 1.1 |
|---|---|---|
|
Unavailable |
Available |
*1 This function is available for the following models:
IM C2000/C2500/C3000/C3500/C4500/C5500/C6000 series
GS3020c/GS3025c/GS3030c/GS3045c/GS3160c
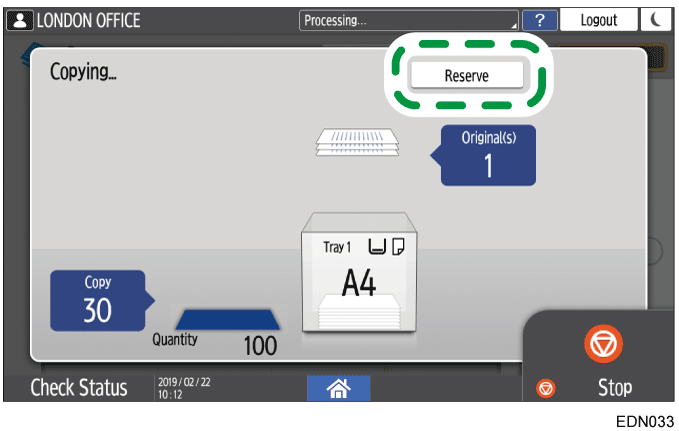
Reserve
When [Reserve] is displayed on the execution screen of the current copy job, you can scan the original of another copy job to execute after the current job is completed (Job Preset).
You can make reservations for up to eight jobs each in the Copier and Document Server functions.
Press [Reserve] on the execution screen of a copy job.
Place a new original to scan on the machine.
Specify 2 sided, Combine, Sort, and other copy settings if necessary.
Press [ReserveStart].
The machine starts scanning the placed original.
After the current copy job is completed, the reserved copy job starts automatically.
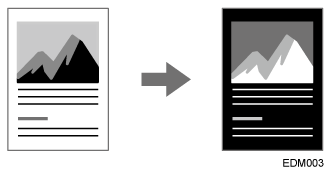
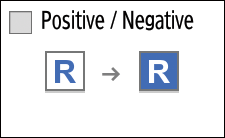
Positive / Negative
You can invert the blacks and whites in a black-and-white original when copying. A color original is copied in the complementary colors with inverted density and brightness.
Press [Copy] on the Home screen.
Press [Positive / Negative] on the Copy screen.
If you cannot find the key, select the item from [Edit / Color].Place an original on the machine, and then press [Start].

Mirror Image
You can copy an original while flipping it horizontally (Mirror).
Stamps and page numbers are not inverted.
Press [Copy] on the Home screen.
Press [Mirror Image] on the Copy screen.
If you cannot find the key, select the item from [Edit / Color].Place an original on the machine, and then press [Start].
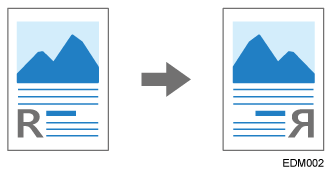
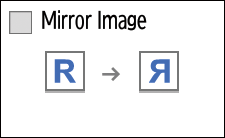
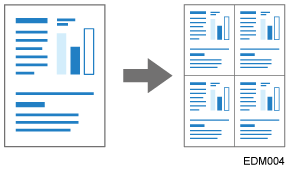
Image Repeat
You can place duplicates of the scanned original on a single sheet of paper when copying (Repeat). To copy an original to a size smaller than the minimum size that can be copied on the machine, copy the original by combining Reduce copy and Repeat, and then cut the copied paper.
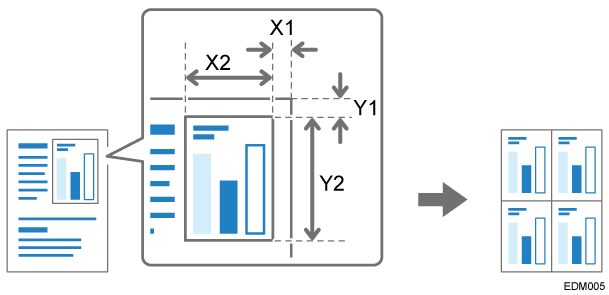
You can also specify the area to scan, and repeat only a section of the original image.
The number of images that can be repeated on a single sheet of paper when repeating the entire area of the original is determined automatically by the original size, paper size, and scaling factor. See below for the number of repeated images that can be arranged on a single sheet of paper for each paper size and orientation:
Original sizes
paper sizes
4 repeats (71%)
16 repeats (35%)
A5

A5

51/2 × 81/2
51/2 × 81/2
Original sizes
2 repeats (100%)
8 repeats (50%)
32 repeats (25%)
A5
A5
51/2 × 81/2
51/2 × 81/2
Press [Copy] on the Home screen.
Press [Image Repeat] on the Copy screen.

If you cannot find the key, select the item from [Edit / Color].Specify the repeating method, and then press [OK].
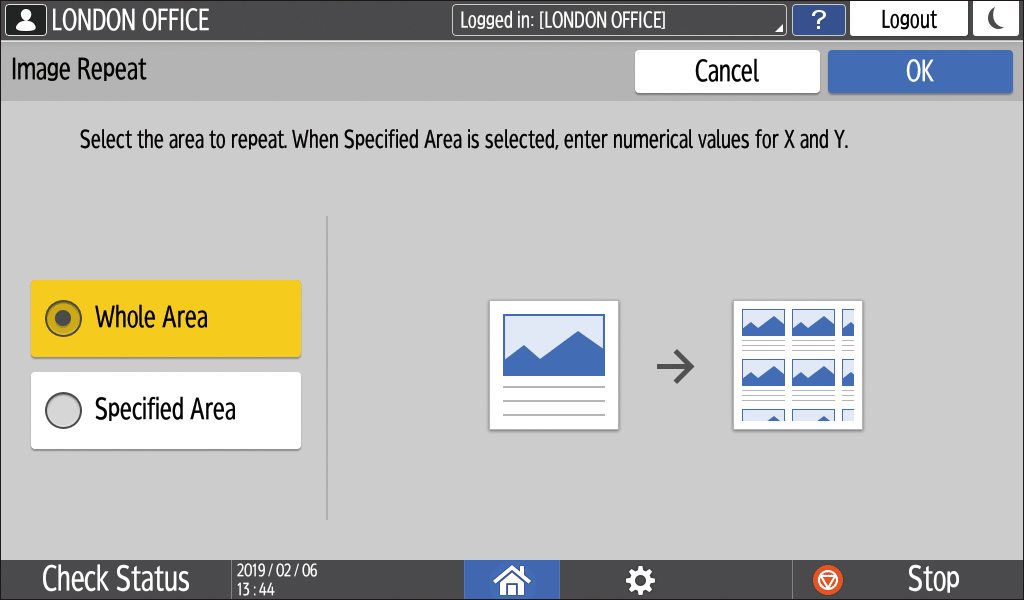
To repeat the entire area of the original, select [Whole Area].
To repeat only a section of the original, select [Specified Area], and then specify the base point (X1,Y1) and the scan range (X2, Y2) of the area to scan.
Select the paper to copy onto, and specify the scaling factor.
Place the original on the machine.
To repeat only a section of the original, place the original on the exposure glass.Press [Start].
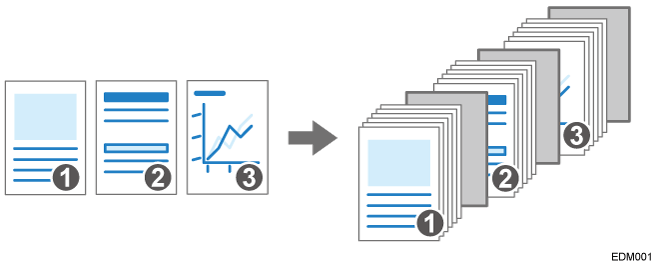
Slip Sheet
You can insert a sheet of paper at the turn of a page when copying an original comprising multiple pages at one time (Slip Sheet).
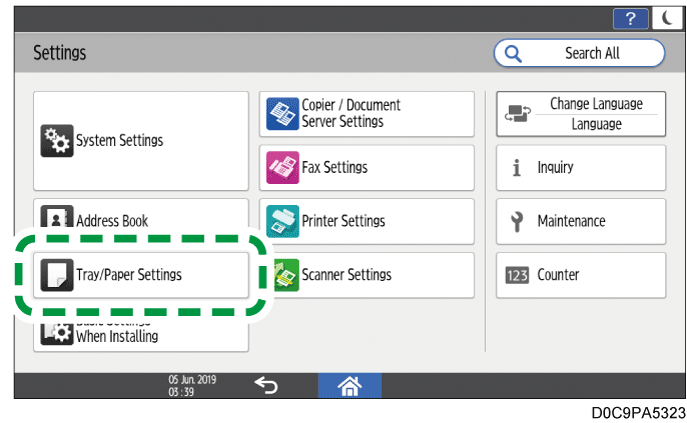
Press [Settings] on the Hone screen.
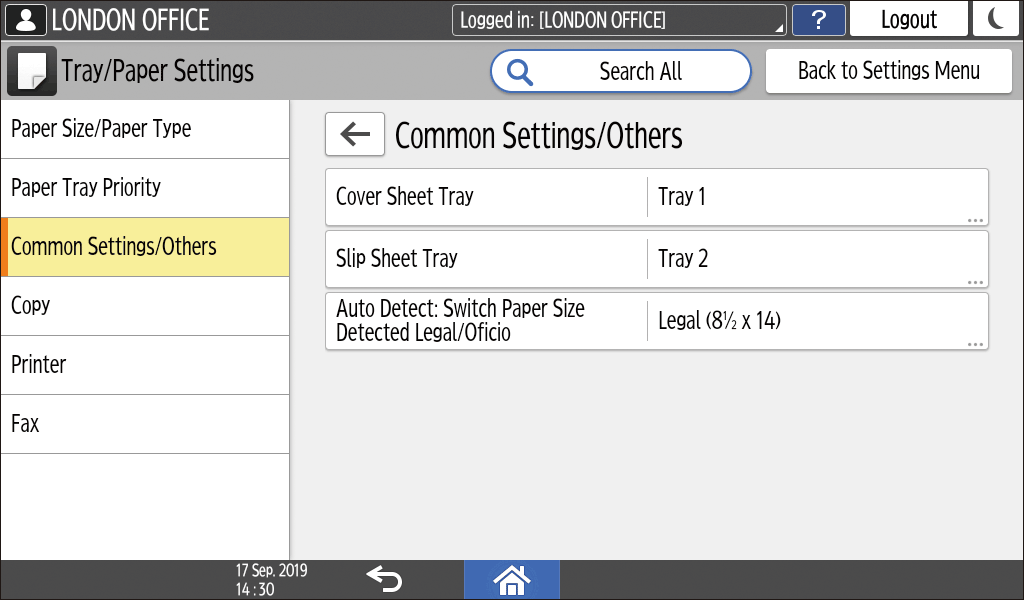
Press [Tray/Paper Settings].
Press [Common Settings/Others]
[Slip Sheet Tray], and specify the tray to feed slip sheets.
As the paper to use for slip sheets, load paper of the same size and orientation as the paper to copy.Press [OK].
Press [Home] (
) after specifying the settings.
Press [Copy] on the Home screen.
Press [Slip Sheet] on the Copy screen.
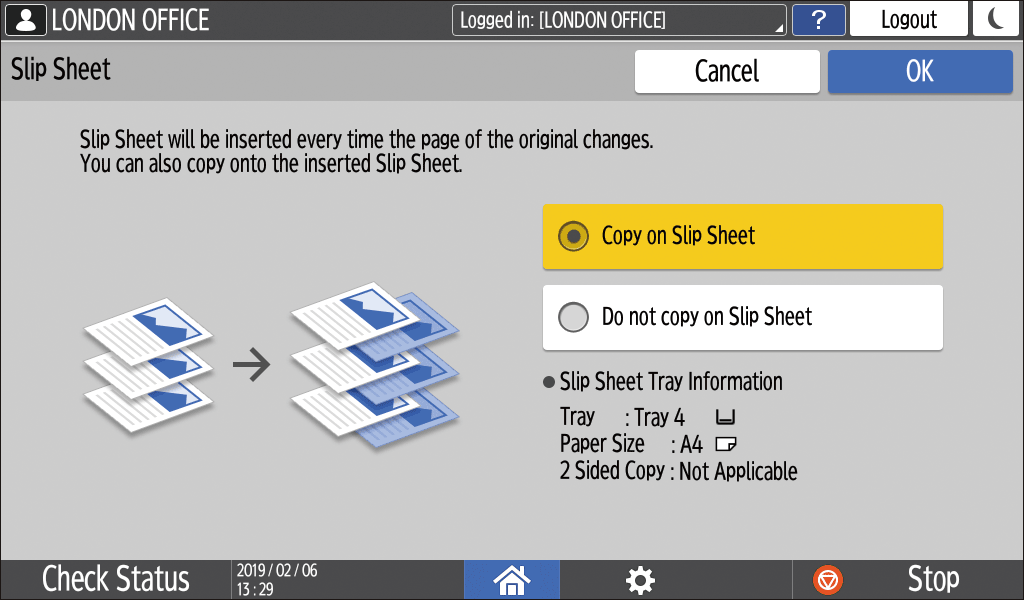
If you cannot find the key, select the item from [Finishing].Specify whether to also copy on the slip sheets, and then press [OK].
You can also copy onto the paper to be inserted as slip sheets. Slip sheets are not counted with the number of copies made in the Copier function when you are not copying onto them.Press [Paper Select], and then select the tray loaded with the paper to use for copying.
Place an original on the machine, and then press [Start].


To display the Job Confirmation screen, press [Job Confirmation]. You can delete the reserved job or view the preview image on the screen.
Following functions of [Copier (Classic)] are now available in [Copy].
Function |
Up to version 1.1 |
Version 1.2 |
|---|---|---|
|
Unavailable |
Available |
*1 This function is available for the following models:
IM C2000/C2500/C3000/C3500/C4500/C5500/C6000 series
IM C300/C400 series
IM C6500/C8000
GS3020c/GS3025c/GS3030c/GS3045c/GS3160c
*2 This function is available for IM C6500/C8000.

Color Overlay may change the color of the image, because the entire original will be colored.
When inserting a front cover, you cannot copy the text body on the paper of Bypass Tray.
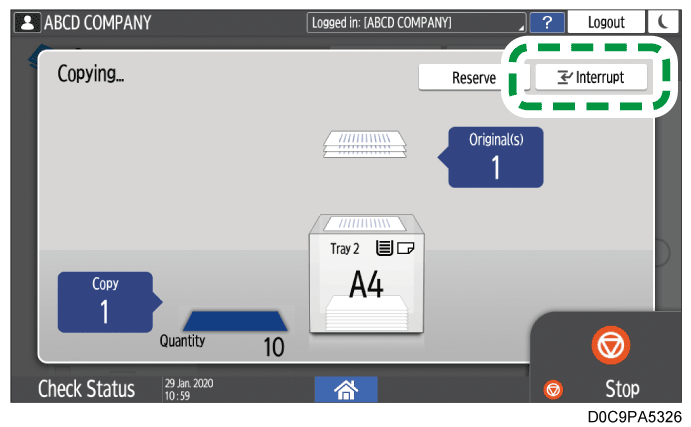
Interrupt
When [Interrupt] is displayed on the copy processing screen, you can pause the current copy to scan and copy another original (Interrupt mode).
Press [Interrupt] on the execution screen of a copy job.
Remove the original being copied, and then place a new original to scan on the machine.
Specify 2 sided, Combine, Sort, and other copy settings if necessary.
Press [Interrupt Start].
When copying is finished, remove the original and the paper copy.
Set the rest of the original that was supposed to be copied before the Interrupt mode, and press [Cancel Interrupt].
The machine restarts the interrupted copying.
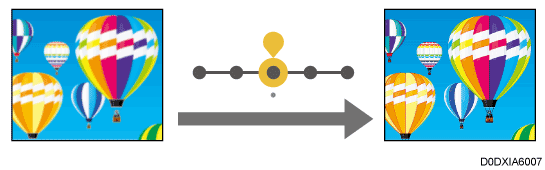
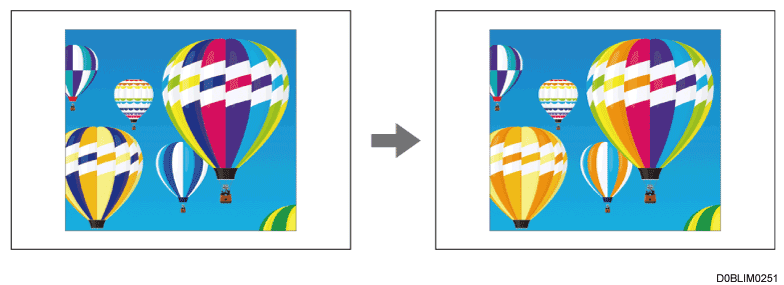
Convert Color
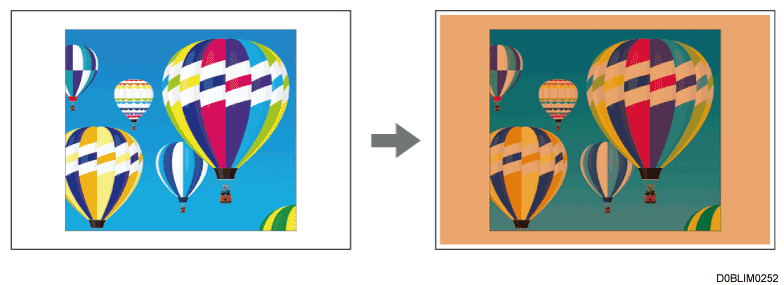
Register a combination of color before and after conversion. For example, the blue part of the original can be replaced with orange when copying. Up to four colors can be replaced at the same time.
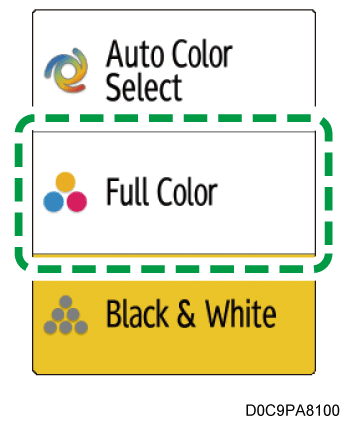
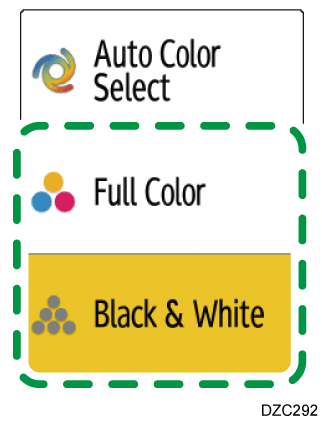
Convert Color is enabled when selecting [Full Color] in Color Mode.
Press [Copy] on the Home screen.
Select [Full Color] on the Copy screen.
Press [Convert Color] on the Copy screen.
If the key is not found, select it from [Edit/Color].Select the [Conversion 1].
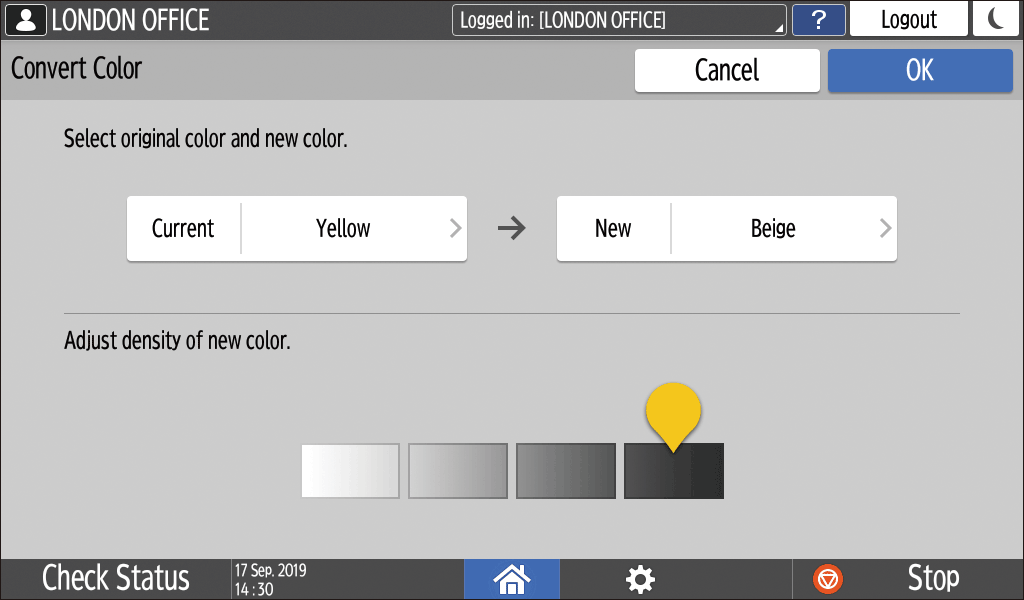
Specify the Color and Density to Convert.
Press [Current] to specify the color to convert in the original.
Press [New] to specify the color that will be used instead of the specified color in the original.
Adjust the density of New, and then press [OK].
To convert another color, press [Conversion 2] to [Conversion 4] to specify a combination of color and density.
Press [OK].
Place the original.
Press [Start].
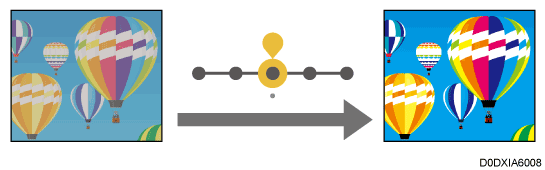
Color Overlay
Specify a color and density to overlay.
This function overlays a specified color on the entire output sheet.
Color Overlay is enabled when [Full Color]/[Black & White]/[Others] is selected in Color Mode.
Press [Copy] on the Home screen.
Select [Full Color] or [Black & White] on the Copy screen.
Press [Color Overlay] on the Copy screen.
If the key is not found, select it from [Edit/Color].Specify the color and density to overlay, and then press [OK].
Place the original.
Press [Start].

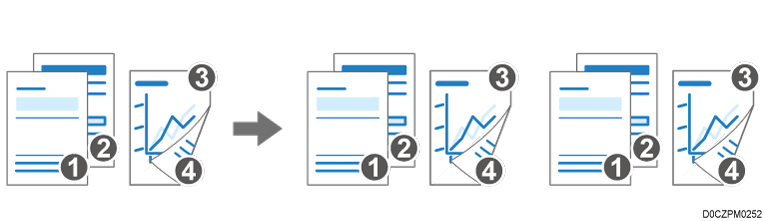
1 & 2 Sided Mixed
You can copy a document which includes one-sided and two-sided pages as a single job by changing copy settings during the scan.
You can prevent blank copies by configuring not to print the back page of one-sided originals.
You can sort multiple sets of copies by copying the document as a single job.
The following is an example of scanning one-sided originals first and then two-sided originals to perform duplex copies.
Press [Copy] on the Home screen.
When copying two or more sets of copies using the ADF, enable [Batch] on the Copy screen.Press [1 & 2 Sided Mixed] on the Copy screen.
If the key is not displayed, select it from [2 Sided/Combine].Select "Original Direction" for one-sided original, and then specify Original Setting and Print Side Setting.
Original Direction: Specify the direction of original.
Original Setting: Select [1 Sided].
Print Side Setting: Select [Open to Top] or [Open to Right/Left] for to the processed duplex copies.
Place one-sided originals.
Press [Start].
When scanning of the originals is complete, press [Change 1, 2 Sided].
You can now change the scan settings.
If the number of the scanned one-sided originals is odd, a one-sided copy is processed, and then the two-sided original scanned subsequently is printed starting from its front page.
Select "Original Direction" for two-sided original, and then specify Original Setting and Print Side Setting.
Original Setting: Select [Open to Top] or [Open to Right/Left] according to how the original is opened.
Print Side Setting: Select [Open to Top] or [Open to Right/Left] for to the processed duplex copies.
Place the originals, and then press [Start].

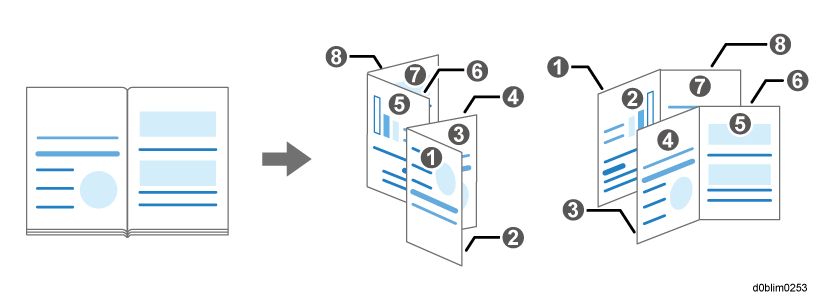
Booklet Copy
Copy a bound book in the format of Booklet or Magazine.
Press [Copy] on the Home screen.
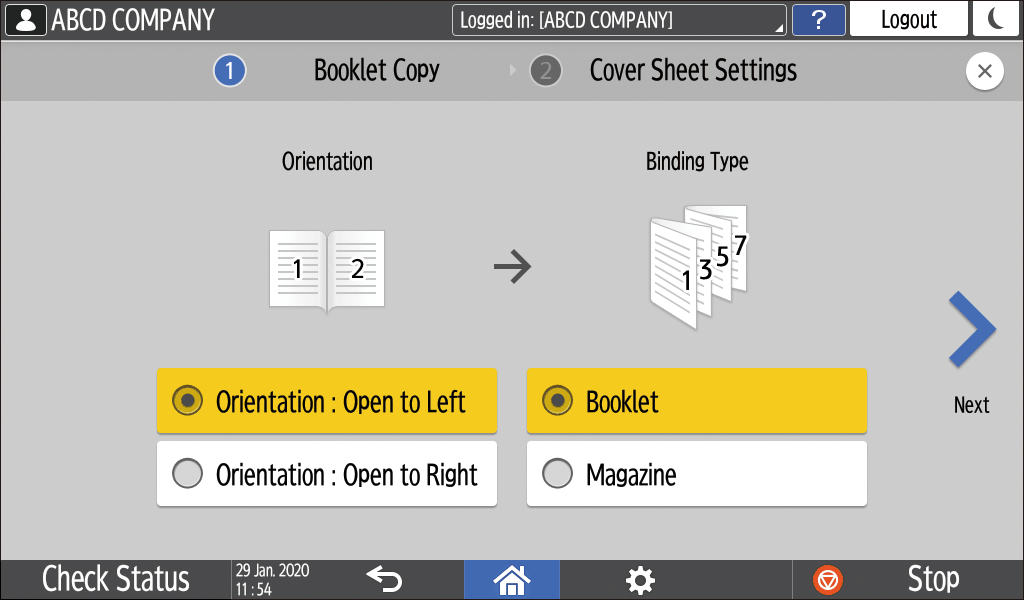
Press [Booklet Copy] on the Copy screen.
If the key is not found, select it from [2 Sided/Combine].Select the Orientation and Binding Type, and proceed to the next screen.
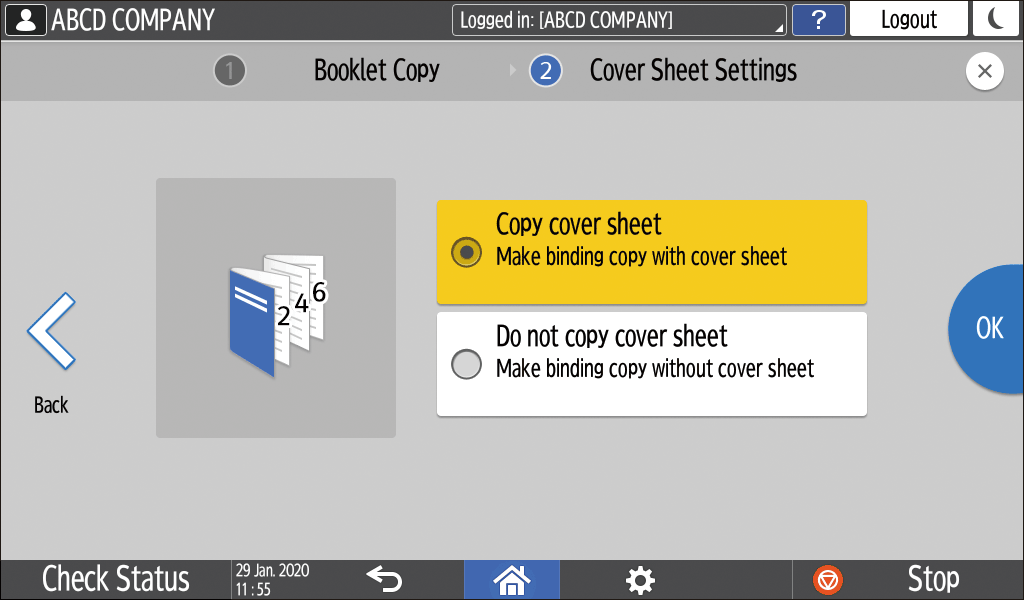
Specify whether to copy the cover sheet, and then press [OK].
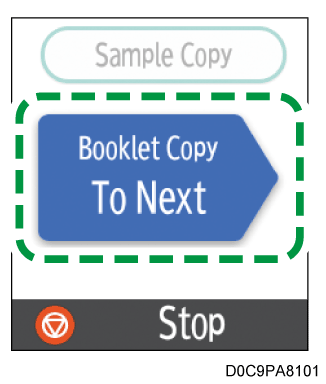
Press [Booklet Copy To Next].
Follow the on-screen instructions to scan the cover sheet and inside pages of the source book on the exposure glass.
After scanning all of the originals, press [Finish Scn].
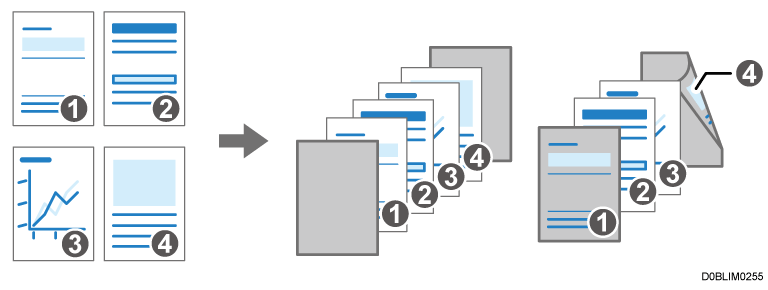
Cover Sheet
Adds Front Cover and Back Cover to the printed matter. Paper for the cover sheet is fed from a different tray from that of the main paper. You can use paper of a different type such as thick paper for the cover sheet.
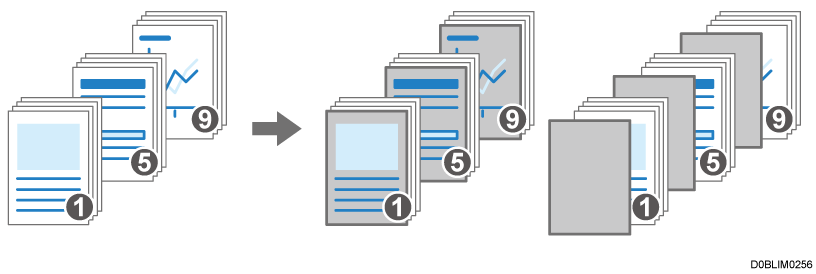
The following types of cover sheet are available:
Front Cover
Inserts a cover sheet before the first page. You can also copy something onto the cover sheet.Front & Back Cover
Inserts a cover sheet before the first page and after the last page of the original. You can also copy something onto the cover sheet.Back Cover
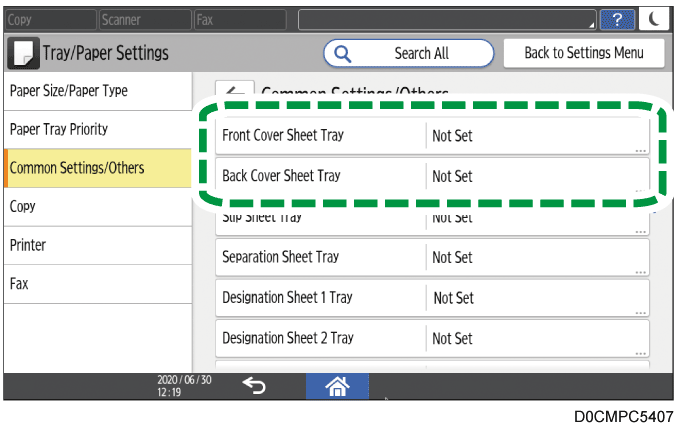
Inserts a cover sheet after the last page. You can also copy something onto the cover sheet.Specify the paper tray from which to feed a sheet for the cover sheet and specify the type of cover sheet.
Press [Settings] on the Home screen.
Press [Tray/Paper Settings].
Press [Common Settings/Others]
The paper to use for the cover sheet must be the same size and orientation as the paper for the body text.Press [OK].
Press [Home] (
) after specifying the settings.
Press [Copy] on the Home screen.
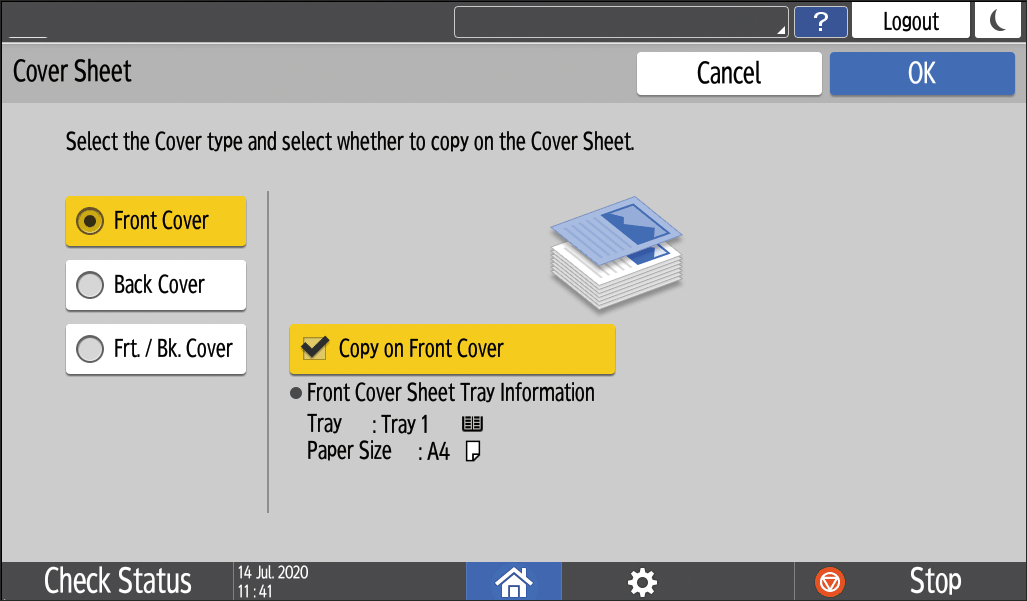
Press [Cover Sheet] on the Copy screen.
If you cannot find the key, select it from [Finishing].Select the type of the cover sheet to insert, and specify whether to copy on the cover sheet.
Press [OK].
Place the original.
Press [Start].

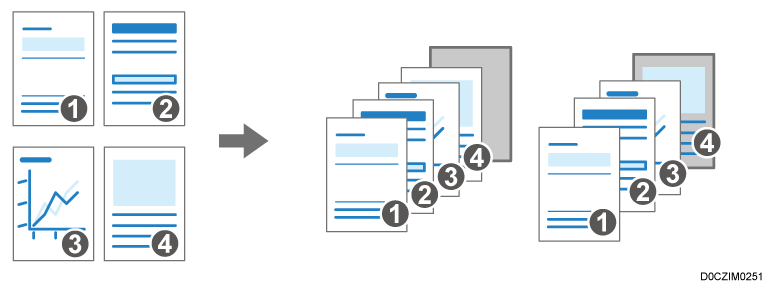
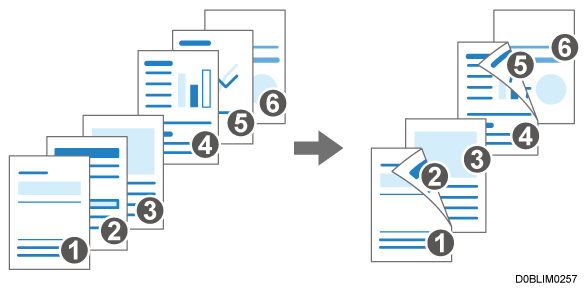
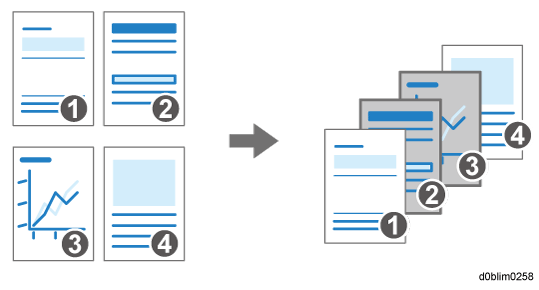
Designate / Chapters
You can specify a chapter page to insert a blank sheet or specify the print side.
Designate: Copy, Designate: Do not copy
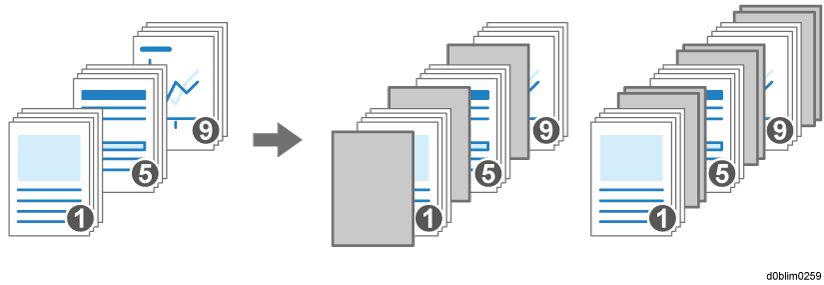
Inserts blank sheets before specified pages. You can also set the machine to print the data of a specified page on the pages designated as chapters.
Chapter
Prints a chapter page always on the front side during 2-sided copy.
Designated Sheet
You can copy a designated area of a page onto chapter slip sheets.Insert Sheet
Inserts a chapter sheet before or after the specified pages.
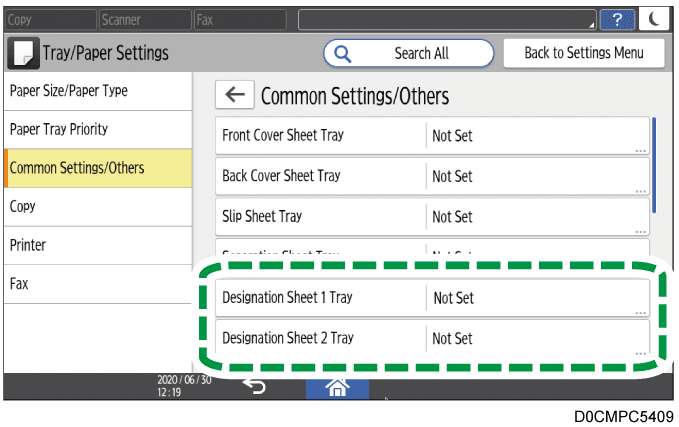
Press [Settings] on the Home screen.
Press [Tray/Paper Settings].
Press [Common Settings/Others]
The paper for the designation must be the same size and direction as the paper for the body text.Press [OK].
Press [Home] (
Press [Copy] on the Home screen.
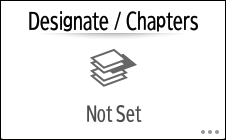
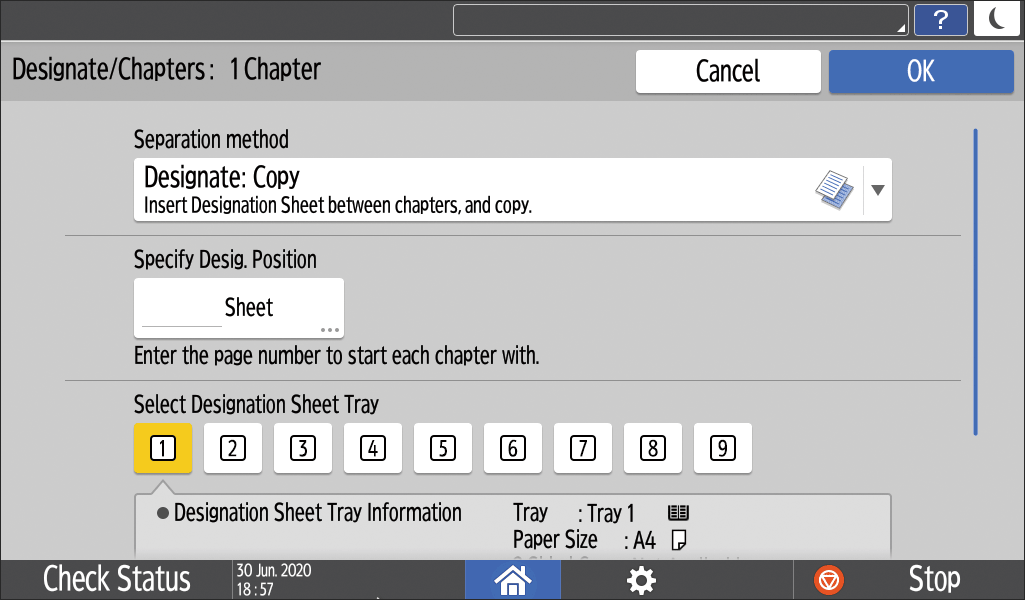
Press [Designate / Chapters] on the Copy screen.
If you cannot find the key, select it from [Finishing].Press [Not Set].
Select Separation method to specify the position to separate and the input tray.
Separation method : Select the method of chapter designation.
Specify Desig. Position : Enter the page number of the original at the beginning of the chapter. When [Designated Sheet] is selected in "Separation method", you can specify which area to copy onto chapter slip sheets by checking [Specify Area]. When [Insert Sheet] is selected in "Separation method", specify the number of sheets to be inserted before or after the specified position.
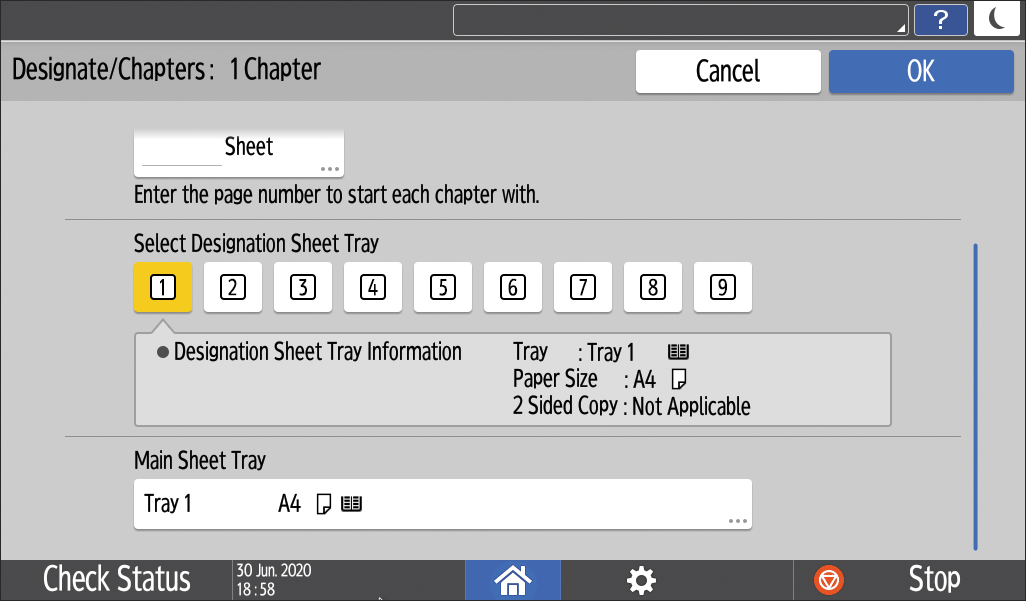
Select Designation Sheet Tray : Select the input tray to feed designated sheets specified in Step3.
Main Sheet Tray : Selects the input tray to feed paper for the text body.
Press [OK].
Press [Not Set] to specify the separation mode for the next section.
You can specify separations up to 100 locations.After specifying all the locations for designating chapters, press [OK] on the "Designate / Chapters" screen.
Place the original.
Press [Start].
You cannot use the Interrupt mode while scanning a fax original.
You cannot use the Interrupt mode with the staple mode while copying in the staple mode.
You can adjust the color range before conversion in five levels. For example, when you select [Wider] and specify Red for conversion, colors near magenta or orange are also converted. Configure the setting in [Color Sensitivity].
When you do not copy on the cover sheet, the cover sheet is not counted as the number of copies.
In [Front Cover Copy in Combine], you can change the setting to not combine the front cover only.
When copying on the back side of the cover sheet in 2-sided copy mode, set as follows according to the settings of the machine.
When [Tray/Paper Settings]
[Common Settings/Others][Front Cover Sheet Tray] or [Back Cover Sheet Tray][Display Time] is set to [At Mode Selected], set [Front Cover Sheet Tray] or [Back Cover Sheet Tray][Apply Duplex] to [Yes].When [Tray/Paper Settings]
[Common Settings/Others][Front Cover Sheet Tray] or [Back Cover Sheet Tray][Display Time] is set to [Full Time], select the [Apply Duplex] check box of the tray to feed cover sheets in [Paper Size/Paper Type].
When you do not copy on designated sheets, the designated sheets are not counted as the number of copies.
Even in 2-sided copy, the pages specified in the separation mode setting are always printed on the front side.
Following functions of [Copier (Classic)] are now available in [Copy].
[Text/Photo Sensitivity Adjustment] and [Adjust U.C.R.] are not displayed on IM 550/600 series, IM 2500/3000/3500/4000/5000/6000 series, and GS3025m/GS3030m/GS3035m/GS3040m/GS3050m/GS3060m.
Function |
Up to version 2.0 |
Version 2.1 |
|---|---|---|
|
Unavailable |
Available |
Directional Magnification(%)
You can separately enlarge or reduce the vertical length and horizontal length of the image and make copies as vertically long or horizontally long.
On the Copy screen, press [Copy Ratio]
Enter the vertical and horizontal magnification, and then press [OK].
Directional Mag.(mm) / Directional Mag.(inch)
You can separately enlarge or reduce the vertical length and horizontal length of the image and make copies as vertically long or horizontally long.
On the Copy screen, press [Copy Ratio]
Enter the vertical and horizontal magnification, and then press [OK].
Spread 2 Sided (Keep Spread)
Copies a facing-page of book-like original onto separate sheets, and copies the next page onto the back of the second sheet, to maintain original layout.
On the Copy screen, press [2 Sided/Combine] or [Series/Book]
Select the opening direction under "Copy", and then press [Keep Spread].
Press [OK].
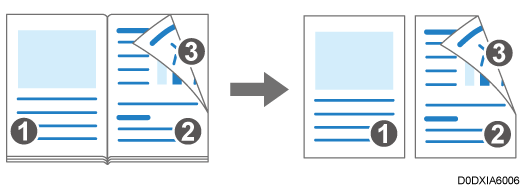
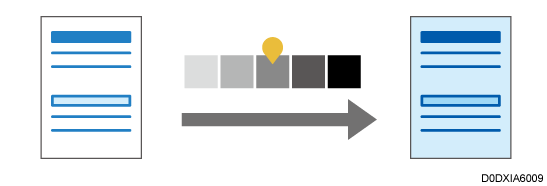
Image Quality Adjustment
You can adjust the image of the original according to how you want the printout to appear.
On the Copy screen, press [Edit/Color] or [Edit / Stamp]
Adjust the image characteristics you want to change by dragging
left or right.
The following five types of image adjustments are available:
Sharp/Soft
You can adjust the outline of the image.Contrast
You can adjust the darkness of the image.Background Density Adjustment
You can adjust the background density of the image.Text/Photo Sensitivity Adjustment
When the type of the originals is [Text/Photo], you can adjust the criteria for identifying the text and photo parts of the image.Adjust U.C.R.
You can adjust the amount of black toner to clearly express the black parts of the image.