Encrypting Print Job Data
The function to encrypt print job data has been added.
Up to version 1.1 |
Version 1.2 |
|---|---|
Unavailable |
Available |
You can prevent information leaks by encrypting the document in the printer drive when using Locked Print/Stored Print to print it. The algorithm used for encryption is AES-256.
To encrypt the document to store, specify encryption in the printer driver.
Display the "Devices and Printers" screen.
Windows 10 (version 1703 or later), Windows Server 2019
On the [Start] menu, click [Windows System] [Control Panel].
Click [View devices and printers].
Windows 10 (before version 1703), Windows Server 2016
Right-click [Start], and then click [Control Panel].
Click [View devices and printers].
Windows 8.1, Windows Server 2012/2012 R2
On the Charm Bar, click [Settings] [Control Panel].
Click [View devices and printers].
Windows 7, Windows Server 2008 R2
On the [Start] menu, click [Devices and Printers].
Windows Server 2008
On the [Start] menu, click [Control Panel].
Select [Printer] on [Hardware and Sound].
Right-click the printer icon, and then click [Printer Properties].
Click [Advanced Options], and click [Job Type/Code Dialog Settings].
Select [Display [Change Job Type] Dialog Before Printing], and click [OK].
Click [Security Settings], select the [Encrypt Data for Locked Print, Stored Print, and Stored Print (Shared)] check box.
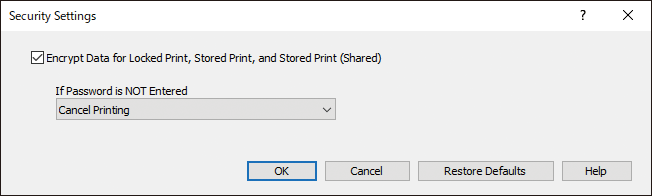
You can also specify whether to continue or cancel printing when no password is specified.Click [OK].
After completing the configuration, close the setting screen of the printer driver.
Perform Locked Print or Stored Print.