Copying in Color
You can switch the color copy mode depending on the type of originals used and the desired finish.
You can also erase or convert a certain color in the original, or add a background color to the whole page.
Primary Colors
Colors can be created by combining the three primary colors: yellow, magenta, and cyan. Black can be made by combining yellow, magenta and cyan; however, as there might be some slight differences, "black" will be expressed using a black toner.
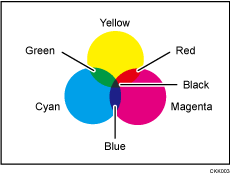

As the color of markers or highlighters is difficult to reproduce, the copy might not come out depending on the color or a different color might be copied.
Automatically Selecting a Color Mode
In the Auto Color Select mode, the color of the original is detected automatically, and the original will be copied either in full color or black and white.
If this mode is enabled, the machine detects whether the original is full color or black and white by scanning the center of the original. If an original is as small as a business card or nearly colorless or has a very small color area, color detection cannot be performed and the original in full color may be recognized as a black-and-white original. Select the Full Color mode when copying color originals that are small, nearly colorless, or has a very small color area.
 Press [Auto Color Select].
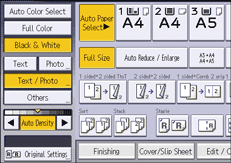
 Place the originals, and then press [Start].
Copying in Full Color
Copies using four colors: yellow, magenta, cyan, and black.
 Press [Full Color].

 Place the originals, and then press [Start].

The full color counter values will increase.
Copying in Black and White
Copies in black and white even if the original is colored.
 Make sure that [Black & White] is selected.

 Place the originals, and then press [Start].
Converting Colors
Copies by changing a certain color in the original to another color. Up to four colors can be converted at the same time.
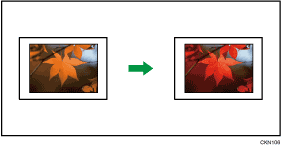
 Press [Full Color].

 Press [Edit / Color].
 Press [Color].
 Press [Convert Color].
 Select any one item from [Conversion 1] to [Conversion 4].
 Select the color to be converted.
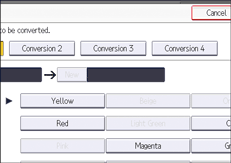
 Select the new color.
You can adjust the density of the color in four steps.
To select user color, press [User Color], and then select the color.
To change two colors or more, repeat Steps 5 to 7.
 Press [OK] three times.
 Place the originals, and then press [Start].

The full color counter values will increase.
The width of the color to be converted can be adjusted in five levels. When the width of the color is set to [Wider] under [Color Sensitivity] in Settings and red has been specified, colors close to orange and purple will be converted. You can change the setting. For details, see the following section:
User colors should be registered in advance. For details about how to register a user color, see Registering User Colors.
Erasing Colors
Copies by erasing a certain color in the image of the original.
This function can be used when [Full Color] or [Black & White] is selected in the color mode.
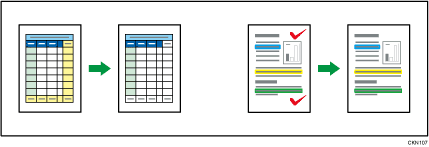
 Select a color mode.

 Press [Edit / Color].
 Press [Color].
 Press [Erase Color].
 Select the color to be erased.
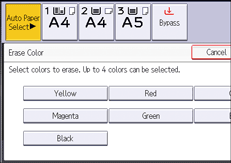
Up to four colors can be erased at the same time.
 Press [OK] twice.
 Place the originals, and then press [Start].

To cancel the selection, press the selected (highlighted) key.
When [Full Color] is selected, the full color counter values will increase.
The width of the color to be erased can be adjusted in five levels. When the width of the color is set to [Wider] under [Color Sensitivity] in Settings and red has been specified, colors close to orange and purple will be erased. You can change the setting. For details, see the following section:
Overlaying Copies with a Color
Copies by adding a color in the whole page.
This function can be used when [Full Color] or [Black & White] is selected in the color mode.
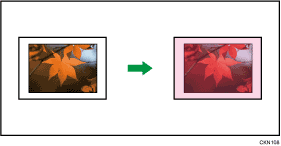

Since the Color Overlay function overprints the entire original, the color of the image may change.
 Select a color mode.

 Press [Edit / Color].
 Press [Color].
 Press [Color Overlay].
 Select the color to overlay the copy.
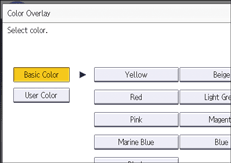
You can adjust the color density in four steps.
To select user color, press [User Color], and then select the color.
 Press [OK] twice.
 Place the originals, and then press [Start].

When copied using the registered color, the original will be copied lighter than the registered color.
User colors should be registered in advance. For details about how to register a user color, see Registering User Colors.
To cancel the selection, press the selected (highlighted) key.
When [Full Color] is selected, the full color counter values will increase.
