Registering User Colors
You can register up to 15 user colors made by adjusting the density of yellow, magenta, cyan, and black. You can also name the colors you register, and print out a list of user colors.
You can create colors by:
Adjusting the density of primary colors based on a chosen basic color.
Directly specifying the density of primary colors using the number keys.

When copying using user colors, the fine shades might vary depending on the condition of the machine.
In order to correctly reproduce originals, the values, which have been input, are corrected inside the machine, and copies are made using the best suitable values. This means that the Text setting and the Photo setting may produce slight differences in the color of the printouts.
Adjusting Colors Based on the Selected Color
Creates colors by adjusting the density of primary colors based on a chosen basic color.
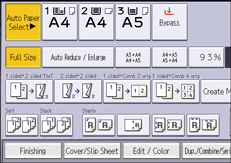
 Press [Edit / Color].

 Press [Color].
 Press [User Color].
 Select the number for the color you want to register.
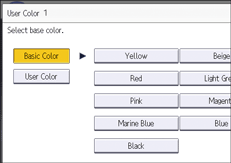
 Select the color to be used as base color.

To select user color, press [User Color], and then select the color.
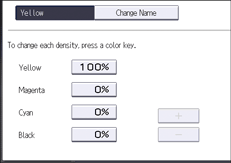
 Select the color whose density is to be specified, and then specify the density in percentages using [
![]() ] or [
] or [![]() ].
].

You can also specify the density by pressing [Adjust with Number Keys].
 Press [OK] three times.

Selecting a user color key that is indicated by a solid line will change (overwrite) the contents of that color.
User colors should be registered in advance. For details about how to register a user color, see Registering User Colors.
This machine automatically sets the name of the registered color based on the specified color. To change it to any name you like, you need to register the color in advance.
Creating Colors by Specifying the Density of Primary Colors with Number Keys
Creates colors by directly specifying the density of primary colors using the number keys.
 Press [Edit / Color].

 Press [Color].
 Press [User Color].
 Select the number for the color you want to register.
 Press [Custom Setting].
 Select the color whose density is to be specified.
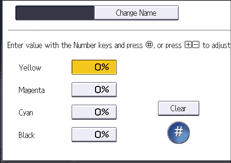
 Enter the density using the number keys, and then press [
![]() ].
].

Repeat Steps 6 to 7 if you want to specify the density of multiple colors.
You can also specify the density by pressing [Adjust with [![]() ] [
] [![]() ]].
]].
 Press [OK] three times.

Selecting a user color key that is indicated by a solid line will change (overwrite) the contents of that color.
This machine automatically sets the name of the registered color based on the specified color. To change it to any name you like, you need to register the color in advance.
Changing the User Color Name
 Press [Edit / Color].

 Press [Color].
 Press [User Color].
 Select the number for the color you want to rename.
 Select the color you want to rename.
 Press [Change Name].
 Enter the name of the color, and then press [OK].
You can enter up to 16 characters.
 Press [OK] three times.
Deleting User Colors

You cannot delete colors registered in the program or user colors that are currently being used.
 Press [Edit / Color].

 Press [Color].
 Press [User Color].
 Press [Delete].
 Select the number of the user color you want to delete.
 Press [Yes].
 Press [OK] twice.
Printing a List of User Colors
 Press [Edit / Color].

 Press [Color].
 Press [User Color].
 Check the copy paper, and then press [Print Sample of User Color].
 Press [OK] twice.

The list will be copied on an A4, 81/2 × 11, B4 JIS, 81/2 × 14, A3, 11 × 17, or 81/2 × 132/5 sheet.
The full color counter values will increase.
