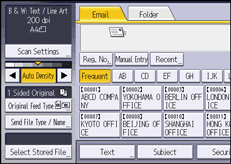
This section explains how to specify file names.
You can configure the machine, so that the scan date and time can be automatically added to the file name of the scanned document.
When you specify any text string to be included in the file name
If [Add Date&Time] is specified, scanned files are given file names that contain the scan date and time, a four-digit page number, and the specified text string.
Single-page and divided multi-page files are assigned file names that contain the date and time of scanning and a four-digit page number. An underscore is inserted between the date and time and the four-digit page number.
(Example: For a file scanned as a single-page TIFF at 15:30 on Dec. 31, 2020, and "test" specified as its name, the file name will be test_202012311530_0001.tif)
Multi-page files are given file names that contain the time and date of scanning.
(Example: For a file scanned as a multi-page TIFF at 15:30 on Dec. 31, 2020, and "test" specified as its name, the file name will be test_202012311530.tif)
When you are not specifying the file name
If [Add Date&Time] is specified, scanned files are given file names that contain the scan date and time, a four-digit page number.
Single-page and divided multi-page files are assigned file names that contain the date and time of scanning and a four-digit page number. An underscore is inserted between the date and time and the four-digit page number.
(Example: For a file scanned as a single-page TIFF at 10 ms, 15 sec., 15:30 on Dec. 31, 2020, the file name will be 20201231153015010_0001.tif)
Multi-page files are given file names that contain the time and date of scanning.
(Example: For a file scanned as a multi-page TIFF at 10 ms, 15 sec., 15:30 on Dec. 31, 2020, the file name will be 20201231153015010.tif)
If necessary, you can change the file name.
![]() Press [Send File Type / Name].
Press [Send File Type / Name].

![]() Press [File Name].
Press [File Name].
![]() Enter the file name, and then press [OK].
Enter the file name, and then press [OK].
![]() If necessary, select [Add Date&Time].
If necessary, select [Add Date&Time].
![]() Press [OK].
Press [OK].
