Before using this function, select [On] under [Change Job Serial No. for First Job] in User Tools. For details, see Stamp Text.
![]()
You cannot use the bypass tray with this function.
![]() Press [Edit / Color].
Press [Edit / Color].
![]() Press [Stamp].
Press [Stamp].
![]() Press [Stamp Text].
Press [Stamp Text].
![]() Press [Change Text].
Press [Change Text].
![]() Enter stamp text, and then press [OK].
Enter stamp text, and then press [OK].
![]() Press [Change Start No.].
Press [Change Start No.].
![]() Enter a number from which to start numbering, and then press [
Enter a number from which to start numbering, and then press [![]() ].
].
![]() Press [OK].
Press [OK].
![]() Press [Change].
Press [Change].
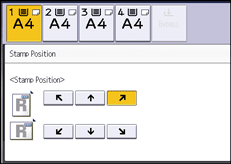
![]() Select the stamp position, and then press [OK].
Select the stamp position, and then press [OK].

![]() Press [Stamp Color].
Press [Stamp Color].
![]() Select the stamp color, and then press [OK].
Select the stamp color, and then press [OK].
![]() Press [OK] twice.
Press [OK] twice.
![]()
Stamps may consist of up to 55 alphanumeric characters and symbols, and a numeric series of up to 9 digits for a total of 64 characters.
The number is displayed in nine digits. If you enter "1", the number is printed as "000000001".
When Auto Clear is done, the [Reset] key is pressed, or the power is turned off, the text is cleared and the next number in the sequence is displayed.
This function cannot be used for the Job Preset or Interrupt Copy function. Also, this function cannot be used to print stored documents.
If this function is used with the Combine function, a print image may differ according to the [Page Numbering in Combine] settings under [Page Numbering]. For details, see Page Numbering.
For details about Stamp Text, see Stamp Text.
