When Paper or an Original Is Jammed
Remove the jammed sheet by following the procedure described in the animated illustration displayed on the control panel. If paper jams occur frequently, check that the actual paper size in the tray, the paper size dial and the [Tray Paper Settings] displayed on the control panel are the same.
Be careful not to rip the jammed paper and leave small pieces inside the machine when removing. Hold on the left and right edges of the paper firmly and apply force evenly to pull out the paper.

- There are highly-heated parts inside the machine. When removing misfed paper, do not touch areas other than those specified in this manual. Touching those areas can result in burns.
- When replacing paper or removing jammed paper, make sure not to trap or injure your fingers.
- When operating the machine, do not put your hand inside the booklet finisher tray of the finisher's staple unit. You may trap your fingers in the machine's gap and injury can result.

When clearing misfeeds, do not turn off the power. If you do, your copy settings will be lost.
To prevent misfeeds, do not leave any torn scraps of paper inside the machine.
Do not turn off the power of the machine when removing the jammed paper. If you turn off the power, the specified settings values are reset.
Only perform the operation described in the animated illustration. Failure to do so may degrade the print quality or cause a malfunction.
If the error message remains displayed even after you remove misfed paper, fully open the front cover, and then close it.
When removing jammed paper, you can touch only those areas explicitly indicated in the manual.
Do not remove the fusing unit. Doing so will result in loss of print quality.

Inside the finisher, or inside the front cover, there are stickers or sheets explaining how to remove misfed paper.
If a detailed removal instruction appears on the right of the screen, follow it.
You can also use the procedure indicated in the [Check Status] screen to remove jammed paper.
When a misfeed occurs inside the machine, the lamp on the center of the drawer flashes and the drawer opens automatically. Remove the jammed paper by following the procedures indicated in the animation that appears on the screen.
When you open the upper left cover of the wide large capacity tray to remove misfed paper, open the upper left cover completely until it stops.
When opening the drawer, make sure to completely pull it out toward you. If the cover of the fusing unit is caught with the main unit, hold the handle at the center of the drawer and pull the drawer out forcibly so that the whole fusing unit protrudes from the front cover.
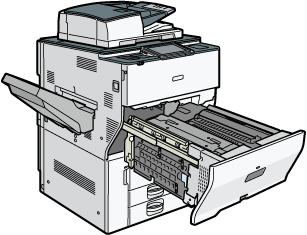
 Check the part where the paper jam occurred on the screen.
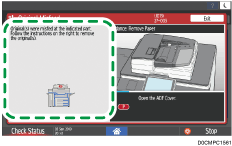
When the display is turned off, press [Check] in [Check Status] "Mach. Status".
 Follow the procedure described in the animated illustration to remove the jammed paper.
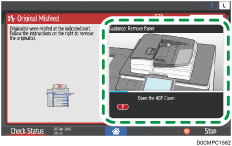
 Close all covers that have been opened.

If the jammed paper was torn apart while removing it, check that all pieces are accounted for.
If paper becomes trapped between the tray and the machine while removing jammed paper, pull out the tray completely and then remove the paper.
If the message remains displayed even after you remove the jammed paper, open the front cover completely and then close it. Check whether any paper is jammed in another location on the screen shown in Step 1 if the message persists.
If you notice a paper jam about to occur in the ADF, press [Stop] to pause scanning, and place the original in the ADF again.
If Paper Jams Occur Frequently
Check that the paper is loaded properly and the settings in [Tray/Paper Settings] are specified correctly.
Paper condition
Items to check | Solution if applicable |
|---|---|
Are the sheets of paper in close contact with each other? | Fan the sheets thoroughly before loading them in the tray. 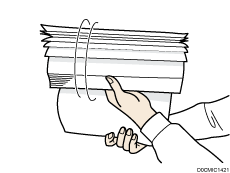 |
Are the sheets of paper curled? |
|
Is the paper flat and not folded or wrinkled? |
|
Is the paper dry and not moist? |
|
Is the cut surface of the paper smooth and clean? | If the cut surface is uneven, set the paper in a different orientation so that the cut surface faces another direction. When the paper supports duplex printing, turn over the paper. |
Is the paper too thick? Is the paper too thin? | Check the specifications for the paper that can be used on the machine, and load paper that is supported. |
Condition of the loaded paper
Items to check | Solution if applicable |
|---|---|
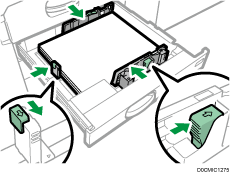
Are too many sheets of paper loaded? | Load paper below the upper limit mark ( |
Are the side fence and end fence in the paper source tray of the mainframe properly adjusted to the paper size? |
|
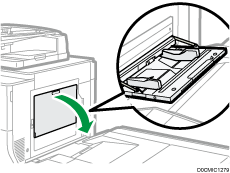
Is the bypass tray used correctly? |
|
Also check the basic procedure for loading paper into the machine again.
Tray/Paper Settings
Items to check | Solution if applicable |
|---|---|
Do the paper size and the setting in [Settings] |
|
Check the paper that can be loaded in the machine again.

 or
or  ) in the tray.
 ) after specifying the settings.