Scanning an Original in a Custom Size
Use the following procedure to scan an original in a non-standard size.
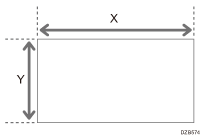
 Using a ruler, measure the vertical and horizontal sizes of the original.

 Press [Scanner] on the Home screen.
 Press [Send Settings] on the scanner screen.
 Press [Scan Size]
 [Custom Size].
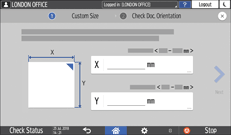
 Enter the values of X and Y that you measured in Step 1 and proceed to the next screen.

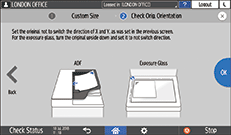
 While maintaining the same X-Y orientation as shown, place the original on the machine and press [OK].

 Specify the scan settings according to the purpose of the scanned data.
Scanning an Original with Suitable Quality and Density
Specifying the File Type or File Name When Scanning a Document
 To send the scanned document to an e-mail address, press [Sender] and then specify the sender.
 Specify the destination, and press [Start].
