Managing the Number of Printed Sheets Using the Classification Code
You can count the number of prints of a job made under each "Classification Code." In addition, you can use user authentication to manage prints by category such as billing or client.
The classification code is recorded in the job log. You can download a job log from Web Image Monitor or a log collection server.
Settings Screen Type: Standard
Settings Screen Type: Classic
Printing with the classification code is enabled in the PCL 6 printer driver.
Preventing Printing of a Job Without a Classification Code
To manage printing by classification code, specify the setting for entering the classification code to [Required] in Web Image Monitor in advance.
 Enter "http://(IP address of the machine) or (host name)/" in the address bar of the Web browser, and then press Enter.
 Enter the user name and password to log in to Web Image Monitor.
 Click [Configuration] from the [Device Management] menu.
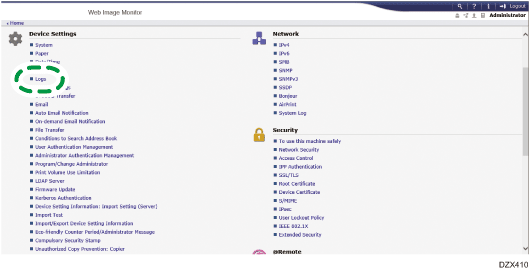
 Click [Logs] of "Device Settings".

 Select [Required] on the classification code of "Common Settings for All Logs".
 Click [OK], and then click [Logout].
 Close Web Image Monitor.
Printing with Entering the Classification Code
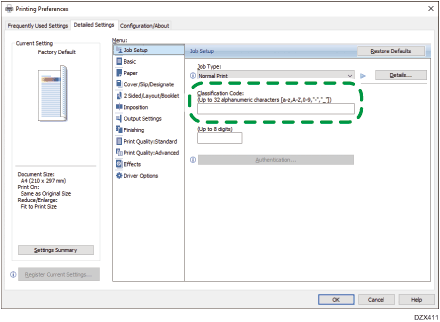
Configure the setting on the [Job Setup] menu of the [Detailed Settings] tab.
 Open a document to print on the computer, and display the setting screen of the printer driver from the print menu in the application.
 Specify Paper Size, Paper Type, Orientation and other settings.
 Enter "Classification Code" from the [Job Setup] menu on the [Detailed Settings] tab.

 After completing the configuration, click [OK] to print.

The entered classification code is stored in the printer driver. When a user is using multiple classification codes, create a printer icon for each classification code to specify a different code when printing without entering the classification code.
