When Printed Colors Appear Differently
When printed colors appear tinted or different from the colors in the original, execute [Auto Color Calibration] to print the test pattern, and then scan the sheet on the exposure glass. The machine adjusts the balance of each toner automatically.
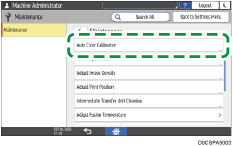
Perform [Auto Color Calibration] in [Settings] [Maintenance].
![]()
The test pattern will be printed on an A4, 81/2 × 11 size page. Make sure to check the paper set into the paper tray.
![]() Press [Settings] on the Home screen.
Press [Settings] on the Home screen.
![]() Press [Maintenance]
Press [Maintenance] [Auto Color Calibration].

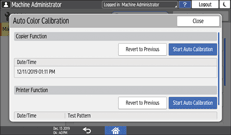
![]() Press [Start Auto Calibration] of the function to perform adjustment, and print the test pattern.
Press [Start Auto Calibration] of the function to perform adjustment, and print the test pattern.

![]() Open the ADF.
Open the ADF.
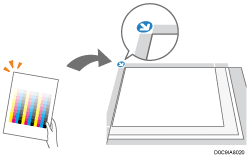
![]() Place the printed test pattern on the exposure glass.
Place the printed test pattern on the exposure glass.
Align the arrow on the test pattern with the rear left corner on the exposure glass.
Place two or three blank sheets of white paper of the same size on the test pattern.

![]() Close the ADF.
Close the ADF.
![]() Press [Start Scanning].
Press [Start Scanning].
![]() Press [Home] (
Press [Home] ( ) after performing the adjustment.
![]()
When the screen is displayed, select [Quick Test Pattern] to apply compensation in a batch, but select a different resolution and apply compensation again if you feel the adjusted color is not appropriate.
If you feel the color before the adjustment is more appropriate than the adjusted color, press [Revert to Previous] in Step 3. The resolution selection screen is displayed when you press [Revert to Previous] under "Printer Function". On the screen, select the same resolution as the one specified when you performed calibration.
When “The printing speed is now being limited because the internal cooling fan is active”, the message [Auto Color Calibration] cannot be executed. Wait until the message disappears, and then execute the function.
