Printing Banner Pages
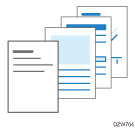
You can insert a banner page, on which the user name, print date and time, and other information are printed before each print job to prevent other users from taking the document by mistake (Banner page).

![]()
Print logs are counted separately for the banner page and print job. When you suspend printing, suspend also printing of the banner page.
The following may occur depending on the application being used:
A banner page is printed for each set of copies when multiple sets of documents are printed.
When pages with different orientations or sizes are mixed in a job, a banner page is inserted before a page whose orientation or size is changed.
A banner page is inserted for each job when a job includes multiple jobs.
Depending on the application, a banner page may be printed for each set of copies when multiple sets of copies are printed.
The printed date and time on the banner page indicate when the command for a job was issued. The date and time may differ from the job history or when the job was executed.
Specifying Banner Page (Windows)
Configure the settings on the [Finishing] tab.
![]() Open a document to print on the computer, and display the setting screen of the printer driver from the print menu in the application.
Open a document to print on the computer, and display the setting screen of the printer driver from the print menu in the application.
![]() Specify Paper Size, Paper Type, Orientation and other settings.
Specify Paper Size, Paper Type, Orientation and other settings.
![]() In [Banner Page] on the [Finishing] tab, specify [On].
In [Banner Page] on the [Finishing] tab, specify [On].
![]() Click the detail settings button, and then select a paper tray and paper type for the banner page.
Click the detail settings button, and then select a paper tray and paper type for the banner page.
![]() Click [OK].
Click [OK].
![]() After completing the configuration, click [OK] to print.
After completing the configuration, click [OK] to print.
![]()
Text with characters other than single-byte alphanumeric characters in the banner page may become garbled.
Specifying Banner Page (macOS)
Configure the settings on the [Paper] menu in [Feature Sets] of [Printer Features].
![]() Open a document to print on the computer, and display the setting screen of the printer driver from the print menu in the application.
Open a document to print on the computer, and display the setting screen of the printer driver from the print menu in the application.
![]() Specify Paper Size, Orientation, Paper Type, and other settings.
Specify Paper Size, Orientation, Paper Type, and other settings.
![]() On [Paper] of [Feature Sets], set Banner Page to [On], and then select the paper tray and paper type.
On [Paper] of [Feature Sets], set Banner Page to [On], and then select the paper tray and paper type.
![]() After completing the configuration, click [Print] to print.
After completing the configuration, click [Print] to print.
