Cleaning the Machine
Smears or dust may appear on copied documents or scanned images when the exposure glass, scan glass, or ADF becomes dirty. Clean those parts.
![]()
- Contact your sales or service representative for cleaning the machine's interior. If the machine's interior is not regularly cleaned while dust accumulates, fire and malfunction can result.
![]()
Do not use chemicals such as cleaning liquid and organic solvents such as paint thinner and benzene for cleaning. It may seep inside the machine through the gaps or melt the plastic material composing the exterior cover, causing malfunctions to occur.
Your service representative will replace the ozone and dust filters as needed.
Cleaning the Exposure Glass and Scan Glass
Use a dry soft cloth to wipe the part.
![]()
Do not close the ADF while hard objects are placed on the scanning glass. Doing so may damage the machine.
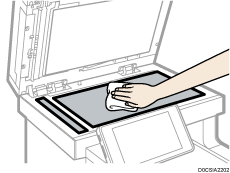
![]() Wipe the exposure glass and scan glass.
Wipe the exposure glass and scan glass.
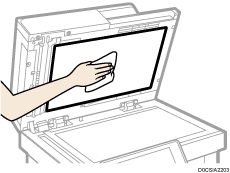
Cleaning the Auto Document Feeder (ADF)
Use a dry soft cloth to wipe the part.
![]() Wipe the seat and guide plate in the One-pass Duplex Scanning ADF.
Wipe the seat and guide plate in the One-pass Duplex Scanning ADF.
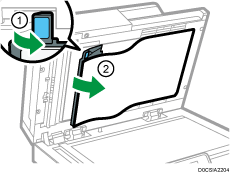
![]() Pull the lever (1) and open the seat (2).
Pull the lever (1) and open the seat (2).
![]() Wipe the scanning glass and the white-plastic strip.
Wipe the scanning glass and the white-plastic strip.
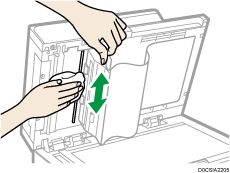
![]() Set the seat back in its original position.
Set the seat back in its original position.
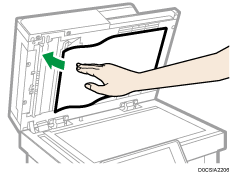
![]() Push the center of the guide plate to return it to its original position.
Push the center of the guide plate to return it to its original position.
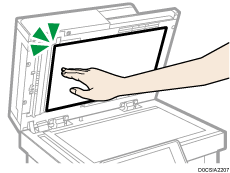
![]() Open the ADF cover (A).
Open the ADF cover (A).
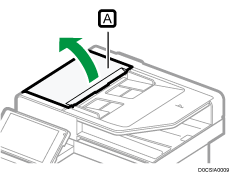
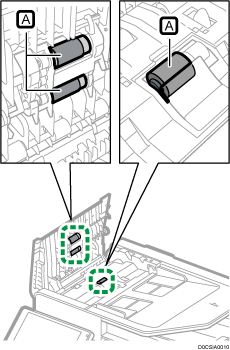
![]() Wipe the ADF paper feed rollers (A) with a soft, dry cloth.
Wipe the ADF paper feed rollers (A) with a soft, dry cloth.
![]()
If dirt does not come off when wiped with a dry cloth, use a cloth that has been soaked in water and thoroughly wrung out.
If dirt does not come off even when wiped with a wet cloth, use neutral detergent and use a dry cloth to wipe off any moisture.
Cleaning the LED Lenses
If prints have voids or light streaks through one or more colors, use the following instructions to clean the LED lenses.
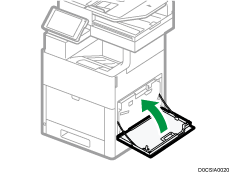
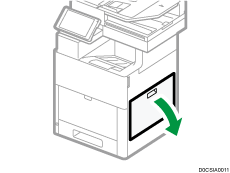
![]() Open the right cover.
Open the right cover.
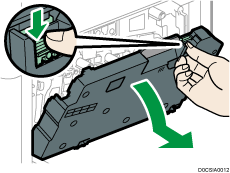
![]() Push the button down to unlock the waste toner bottle, and then bring the top of the cartridge down toward you to remove it.
Push the button down to unlock the waste toner bottle, and then bring the top of the cartridge down toward you to remove it.
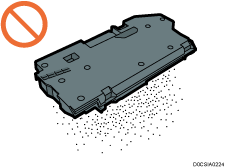
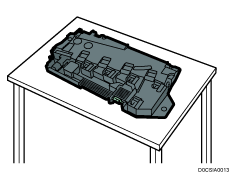
To avoid toner spills or malfunction, do not lay the waste toner bottle on its side, or with the openings facing down.
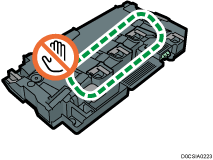
After removing the waste toner bottle, do not touch the area shown in the illustration.
![]() Place the removed waste toner bottle on a level surface with the openings facing up.
Place the removed waste toner bottle on a level surface with the openings facing up.
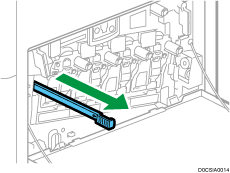
![]() Take the cleaning rod out of the machine.
Take the cleaning rod out of the machine.
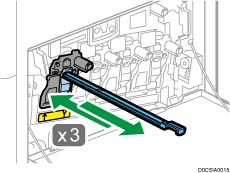
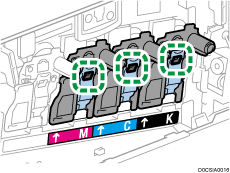
![]() Insert the cleaning rod into one of the four holes until it stops, and then pull out the rod. Repeat this two more times.
Insert the cleaning rod into one of the four holes until it stops, and then pull out the rod. Repeat this two more times.
![]() Repeat the procedure for the other three holes.
Repeat the procedure for the other three holes.
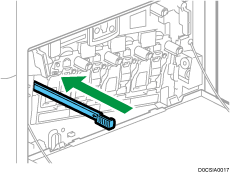
![]() Return the rod to its original position.
Return the rod to its original position.
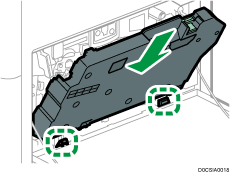
![]() Align the hollows of the waste toner bottle with the protrusions on the machine, and then insert the cartridge into the machine.
Align the hollows of the waste toner bottle with the protrusions on the machine, and then insert the cartridge into the machine.
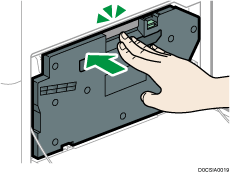
![]() Press the top of the waste toner bottle until it clicks.
Press the top of the waste toner bottle until it clicks.
![]() Close the right cover.
Close the right cover.
