Cleaning the Machine
Smears or dust may appear on copied documents or scanned images when the exposure glass, scan glass, ADF, or dustproof glass becomes dirty. Clean those parts.

|

Do not use chemicals such as cleaning liquid and organic solvents such as paint thinner and benzene for cleaning. It may seep inside the machine through the gaps or melt the plastic material composing the exterior cover, causing malfunctions to occur.
Your service representative will replace the ozone and dust filters as needed.
Use the cleaning cloth provided with the machine to wipe the parts.
Do not close the ADF while hard objects are placed on the scanning glass. Doing so may damage the machine.
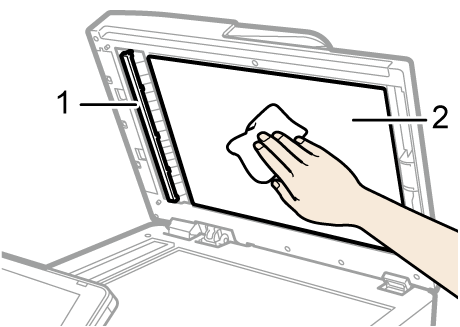
Wipe the exposure glass and the scanning glass.
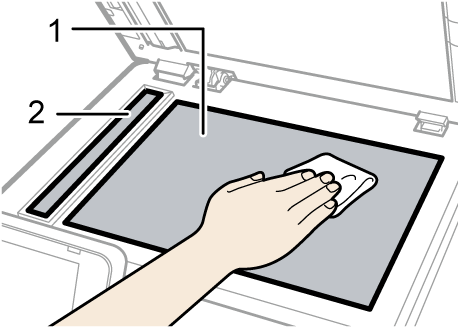
Exposure glass
Scanning glass
Use a dry soft cloth to wipe the part.
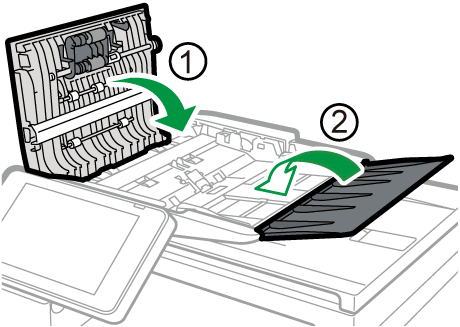
Open the ADF cover.
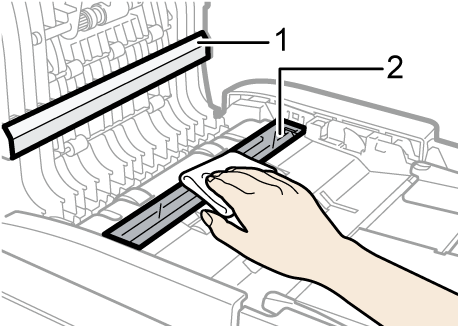
Wipe the scanning glass and the guide plate.
Guide plate
Scanning glass
Close the ADF cover.
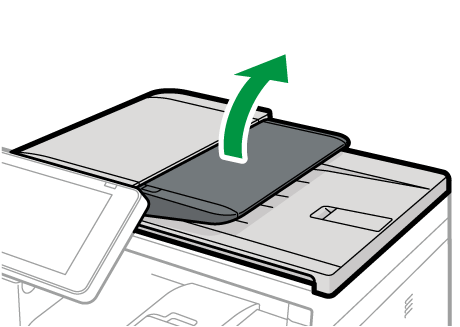
Open the ADF.
Wipe the guide plate and sheet of the ADF.
Guide plate
Sheet


If dirt does not come off when wiped with a dry cloth, use a cloth that has been soaked in water and thoroughly wrung out.
If dirt does not come off even when wiped with a wet cloth, use neutral detergent and use a dry cloth to wipe off any moisture.
If the friction pad or paper feed roller is dirty, a multi-feed or misfeed might occur. In this case, clean the friction pad and paper feed roller as follows:
Do not use chemical cleaning fluids or organic solvents such as thinner or benzine.
Turn off the power.
Unplug the power cord from the wall outlet. Remove all the cables from the machine.
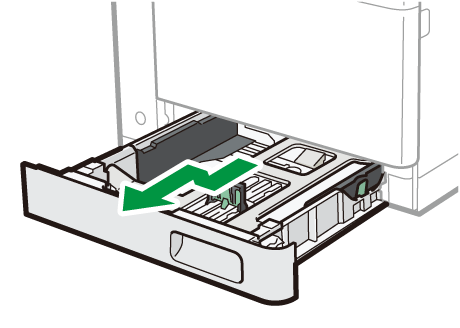
Pull out the paper tray carefully until it stops, and then pull the tray completely out of the machine while slightly raising the front end of the tray.
Place the tray on a flat surface. If there is paper in the tray, remove it.Wipe the interior surfaces of the source tray.
Use a cloth that is soaked in water and then thoroughly wrung out, or a clean, dry cloth, to wipe the location indicated on the illustration. And then, use a clean, dry cloth to remove any moisture.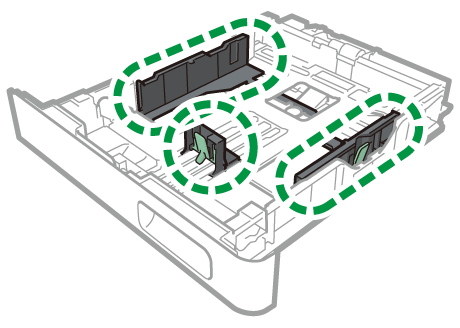
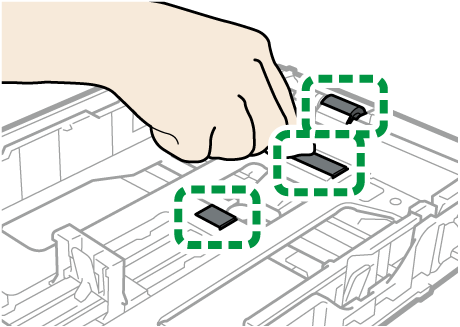
Wipe the feed roller and friction pad using cloth that is soaked in water and then thoroughly wrung out. Wipe the feed roller by turning it and moving it left and right.
While raising the front end of the tray slightly, carefully slide the tray back into the machine until it stops.
To avoid paper jams, make sure the tray is securely inserted.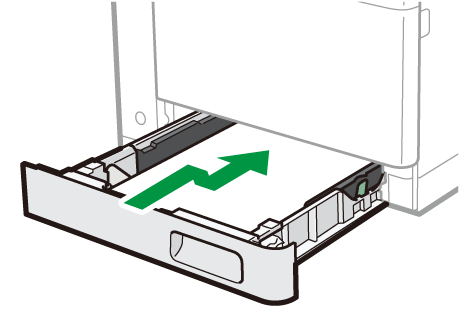
Securely insert the plug of the power cord into the power outlet. Connect all the cables that were removed.
Turn on the power.
- If jams or multi-sheet feeds occur after cleaning the friction pad, contact your sales or service representative.
If the friction pad or paper feed roller is dirty, a multi-feed or misfeed might occur. In this case, clean the friction pad and paper feed roller as follows:
Do not use chemical cleaning fluids or organic solvents such as thinner or benzine.
Turn off the power.
Unplug the power cord from the wall outlet. Remove all the cables from the machine.
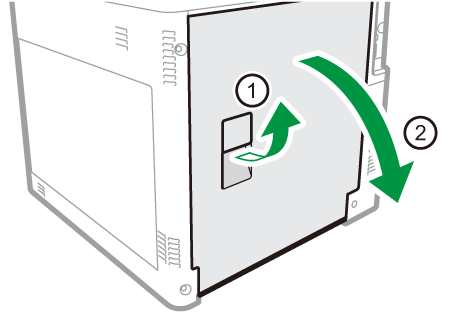
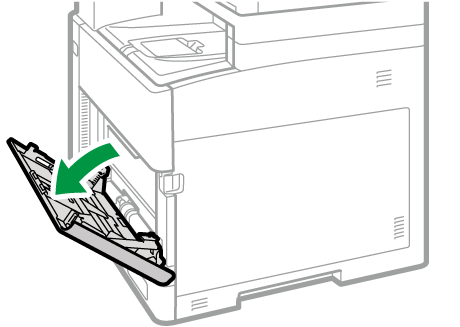
Pull the right side of the bypass tray toward you to open the bypass tray.
Wipe the feed roller and friction pad of the bypass tray using a cloth that is soaked in water and then thoroughly wrung out. And then, use a clean, dry cloth to remove any moisture.
Wipe the feed roller by turning it and moving it left and right.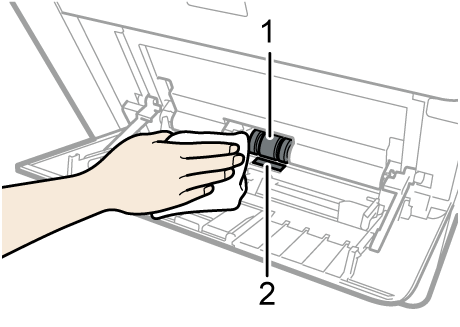
Feed roller
Friction pad
Close the bypass tray.
Insert the plug of the power cord into the wall socket securely. Connect all the cables that were removed.
Turn on the power.
- If jams or multi-sheet feeds occur after cleaning the friction pad, contact your sales or service representative.
Clean the transfer guide board when paper dust causes white spots to appear on parts of the print result.
|
Do not use alcohol or cleaning liquid.
Turn off the power of the machine, and then unplug the power cable from the wall outlet.
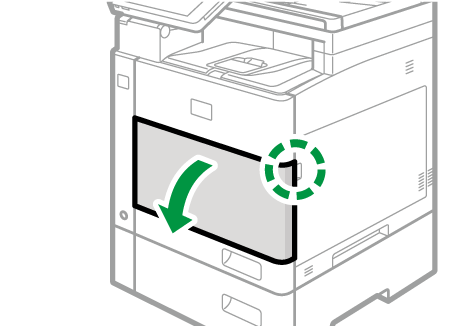
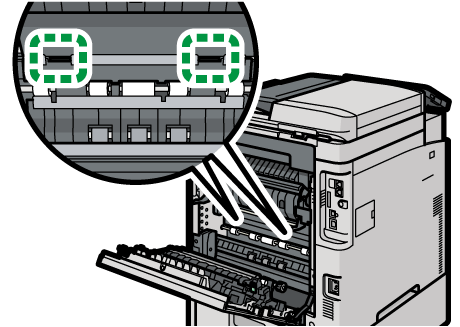
Pull the rear cover open lever toward you to open the rear cover.
The transfer guide board is at the location shown in the following illustration.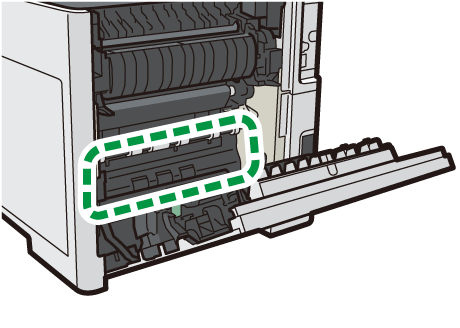
Wipe the transfer guide board using a cloth that is soaked in water and then thoroughly wrung out. Next, use a dry, clean cloth to remove any moisture.
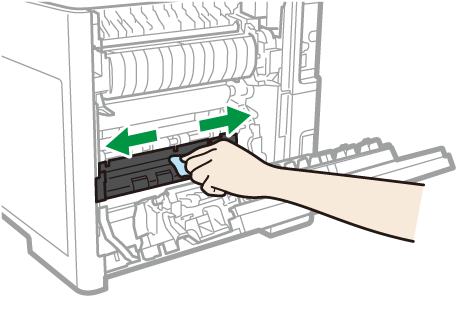
Do not touch the registration roller.
Close the rear cover.
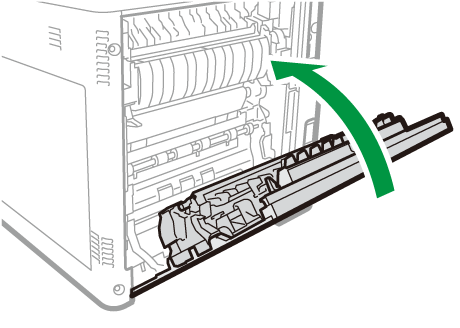
Plug the power cable into the wall outlet, and then turn on the power of the machine.
Use the cleaning rod provided with the machine for cleaning.
Do not insert the cleaning rod forcefully. Doing so may damage the interior of the machine.
Open the bypass tray cover of the machine.
Spread out a piece of paper, or something, so the floor and other surfaces don’t get dirty due to the scattering of waste toner from the waste toner bottle (right cover) as you remove it.While holding the knob tightly, open the right cover (1). And then, pull the right cover out toward the upper right while holding the grip at its top middle (2).
Place the cover on a piece of paper, or something, placed on a flat surface with the inner side up so that waste toner does not spill.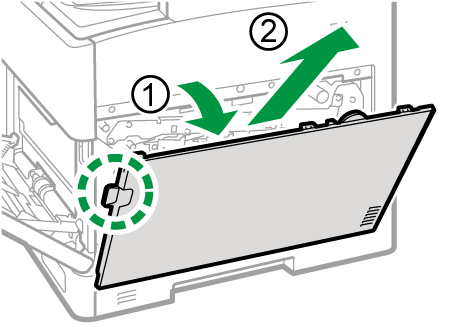
Take out the cleaning rod from the storage space inside the machine.
While holding the handle of the cleaning rod, pull it forward and out carefully.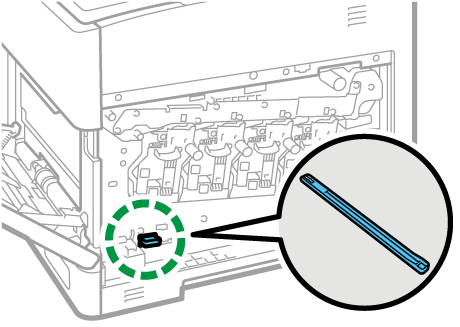
While keeping the surface with the arrow facing up, insert and then pull out the rod in each of four slots.
Insert the rod carefully until it stops, and then pull it out.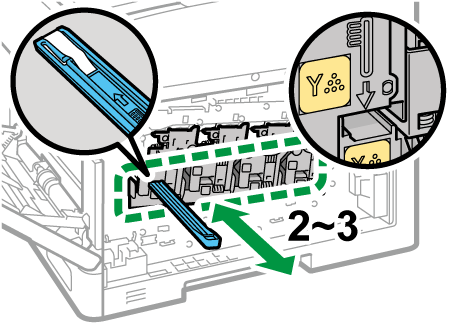
Return the cleaning rod to the storage space.
Hold the cleaning rod by its handle and keep the surface with the arrow facing up as you insert it carefully until it stops.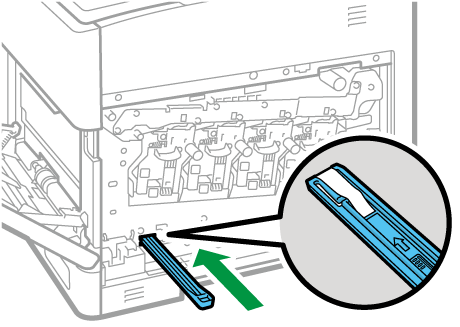
Fit the two protruding parts into the holes on the machine, and then insert the right cover.
Confirm that the right cover is securely affixed to the machine, and then close the right cover.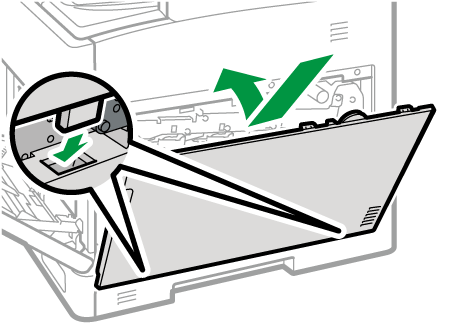
Close the bypass tray cover.
Clean the color toner density sensor when the following message appears.
"Cleaning of the toner density sensor is required. Follow the instructions in the manuals etc. to clean the sensor."
Turn off the power of the machine.
Open the rear cover.
Wipe the color toner density sensor with a clean cotton swab that has been dipped in water and thoroughly wrung out.
Close the rear cover.
Turn on the power of the machine.