How to Read the Information Printed on the Received Page
This section explains how to read the information on received pages printed by the machine or at the destination.
Information Printed on Received Pages at the Destination
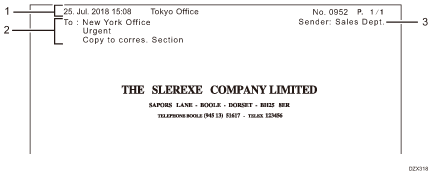
The following information is printed on the received page at the destination according to the settings specified in [Settings]:
![]()
 (mainly North America)
In the USA, the fax header must contain the telephone number of the line your machine is connected to. It will be printed on the header of every page you send. Required in the USA.

Fax Header
The information registered in the Fax Information of the machine is printed. Specify [Fax Header] when sending the fax to print the date of transmission, sender name specified at the time of transmission, document number, and number of pages.
Destination name and standard message
The name of the destination registered in the address book of the machine and a standard message of up to two lines are printed. This information is printed on the first page of a fax received at the destination when [Label Insertion] is specified while sending the fax.
Sender Name
The name of the person sending the fax is printed.
Information Printed on Pages Received by the Machine
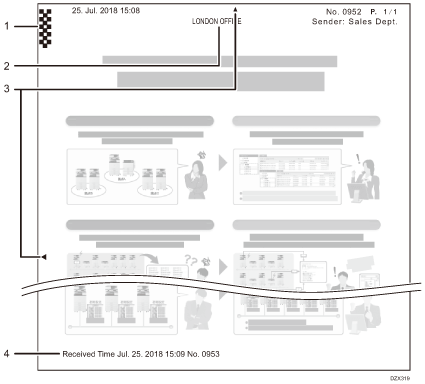
The following information is printed on the page received by the machine according to the settings specified in [Fax Settings]: A fax connected to a public phone line is used in the example shown below.

Checkered Mark
A checkered mark is printed on the first page of the received page. By printing this mark, you can easily sort documents when receiving more than one document at one time.
TSI Print (Transmitting Subscriber Identification Print)
The sender's name, fax number, and e-mail address registered at the origin are printed. This information is printed even if the sender has sent the document while specifying not to print the sender name on the document.
Center Mark
A center mark is printed. You can use the mark as a guide when punching a hole for filing the page.
Reception Time
The date and time the document was received, and its document number are printed.
