Installing the TWAIN Driver
To use the scanner of the machine in an application that supports TWAIN, install the TWAIN driver and register the machine in "Network Connection Tool".
![]()
To import images into the computer directly, you need to install both the TWAIN driver and the application that supports TWAIN.
Installing the Driver
![]() Start the installer of the TWAIN driver.
Start the installer of the TWAIN driver.
To start the installer from the CD-ROM
Set the CD-ROM in the computer.
If the installer does not start automatically, double-click [Setup.exe] in the root directory of the CD-ROM.
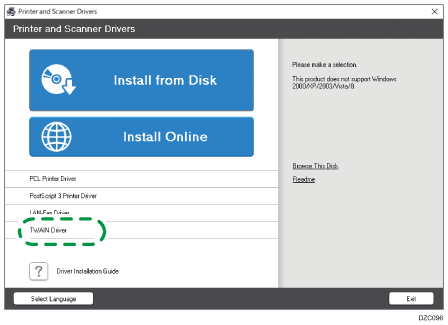
Click [TWAIN Driver].
To execute the downloaded file
Double-click the downloaded file.
Specify the location of the unzipped file, and then click [OK].
If the "Security Warning" screen is displayed, click [OK].
If the "User Account Control" screen is displayed, click [Yes] or [Allow].
![]() On the setup screen, click [Next].
On the setup screen, click [Next].
![]() On the "License Agreement", select [I accept the terms of the license agreement], and then click [Next].
On the "License Agreement", select [I accept the terms of the license agreement], and then click [Next].
![]() On the "Select Program Folder" screen, click [Next].
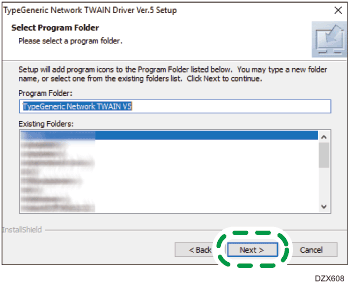
On the "Select Program Folder" screen, click [Next].
Installation starts.
![]() After completing the installation, click [Finish].
After completing the installation, click [Finish].
Setting the Connecting Scanner
To use only the scanner of the machine, or if the machine is not detected automatically, register the machine in "Network Connection Tool".
![]() On the application menu of the computer, click [Network Connection Tool] on [TypeGeneric TWAIN V5].
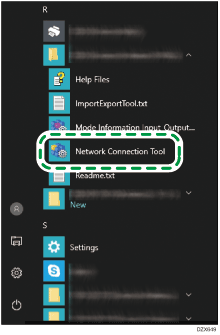
On the application menu of the computer, click [Network Connection Tool] on [TypeGeneric TWAIN V5].
![]() Select the [Specify scanner(s) to use.] check box, and then click [Scanner Search/Registration].
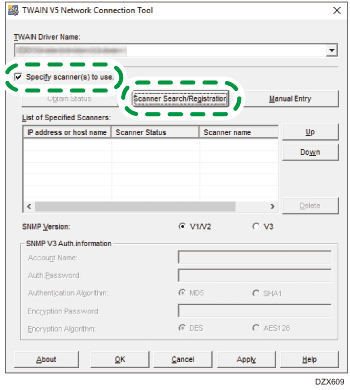
Select the [Specify scanner(s) to use.] check box, and then click [Scanner Search/Registration].
The tool searches for the scanner.
![]() On the "List of Search Results" screen, select the machine and click [OK].
On the "List of Search Results" screen, select the machine and click [OK].
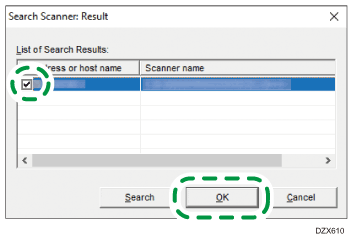
If the machine is not detected, cancel search, click [Manual Entry], and then enter the IP address of the machine.
![]() Confirm that the machine is added to "List of Specified Scanners", and then click [OK].
Confirm that the machine is added to "List of Specified Scanners", and then click [OK].
