Installing the Offline Stapler
This section describes how to install and use the staple unit.
![]()
Do not remove the offline stapler after pressing it to fix it to the release paper.
Do not press or hit the offline stapler strongly. Doing so may damage it.
Do not hold the offline stapler when you move the machine.
![]() Turn off the machine's power, and then pull the power plug out of the wall outlet.
Turn off the machine's power, and then pull the power plug out of the wall outlet.
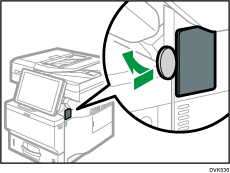
![]() By using a coin, open the cover on the right side of the machine.
By using a coin, open the cover on the right side of the machine.
![]() Take the offline stapler out of the box.
Take the offline stapler out of the box.
The offline stapler consists of a staple unit and a staple unit cradle. These parts are separate in the box.
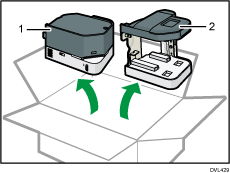
Staple unit
Staple unit cradle
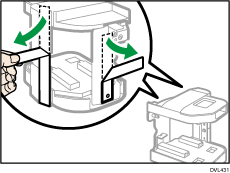
![]() Fold outside the parts of the release paper that are not stuck to the double-sided tapes on the back of the staple unit cradle.
Fold outside the parts of the release paper that are not stuck to the double-sided tapes on the back of the staple unit cradle.
The adhesion of the release paper is strong, so it cannot be detached once it is affixed. Do not affix the release paper until Step 7.
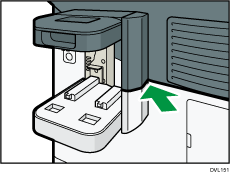
![]() Align the hole on the staple unit cradle to the bump that is on the right side of the machine, and then insert the screw into the screw hole.
Align the hole on the staple unit cradle to the bump that is on the right side of the machine, and then insert the screw into the screw hole.
If the right side of the machine is dirty, clean the surface before mounting the staple unit cradle on the machine.
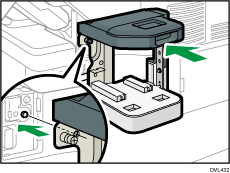
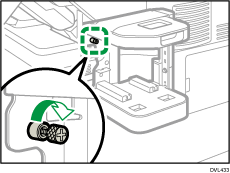
![]() Align the lines of both the machine and the staple unit cradle as shown in the illustration, and then turn the screw until it stops.
Align the lines of both the machine and the staple unit cradle as shown in the illustration, and then turn the screw until it stops.
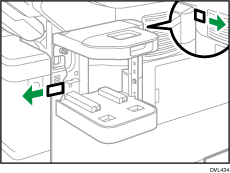
![]() Pull out the pieces of release paper that were folded outside, and then press the staple unit cradle towards the machine.
Pull out the pieces of release paper that were folded outside, and then press the staple unit cradle towards the machine.
Support the staple unit cradle with a hand so that it does not move when pulling out the release paper. Do not press the staple unit forcibly. The release paper may tear. Pull the release paper to the sides slowly.
After removing the release paper, press forcibly on the staple unit cradle to fasten it to the machine.
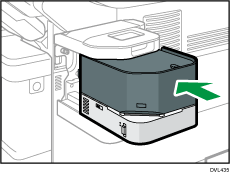
![]() Insert the staple unit into the staple unit cradle.
Insert the staple unit into the staple unit cradle.
Push the staple unit firmly into the back.
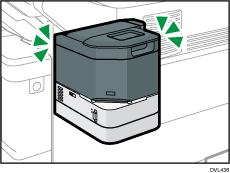
![]() Turn the machine's power on.
Turn the machine's power on.
The power of the offline stapler also turns on.
