Creating and Installing a Device Certificate from the Control Panel (Self-Signed Certificate)
Create and install the device certificate using control panel.
This section explains the use of a self-signed certificate as the device certificate.
![]() Log in as the network administrator from the control panel.
Log in as the network administrator from the control panel.
For details on how to log in, see Administrator Login Method.
![]() Press [System Settings].
Press [System Settings].
![]() Press [Administrator Tools].
Press [Administrator Tools].
![]() Press [
Press [![]() Next] 4 times.
Next] 4 times.
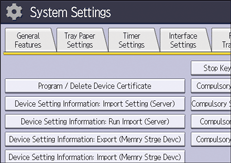
![]() Press [Program / Delete Device Certificate].
Press [Program / Delete Device Certificate].

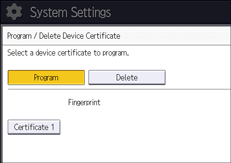
![]() Check that [Program] is selected.
Check that [Program] is selected.

By selecting [Delete], you can delete the device certificate from the machine.
![]() Press [Certificate 1].
Press [Certificate 1].
Only [Certificate 1] can be created from the control panel.
![]() Configure the necessary settings.
Configure the necessary settings.
To use the device certificate for S/MIME, PDF Digital Signature, or PDF/A Digital Signature, enter the machine administrator’s e-mail address in the e-mail address setting.
![]() Press [OK].
Press [OK].
"Installed" appears under "Certificate Status" to show that a device certificate for the machine has been installed.
![]() Log out.
Log out.
For details about logging out, see Administrator Logout Method.
![]()
To use the device certificate created on the machine for S/MIME or PDF/A Digital Signature, set "Certification" in Web Image Monitor controlled from networked computers to [Certificate 1]. (Web Image Monitor is a management tool installed on this machine to monitor this machine or configure settings for this machine by using a web browser.)
