Confirm the Settings of Google Cloud Print for the Machine
You can confirm the settings of Google Cloud Print using a web browser.
![]() Start your web browser.
Start your web browser.
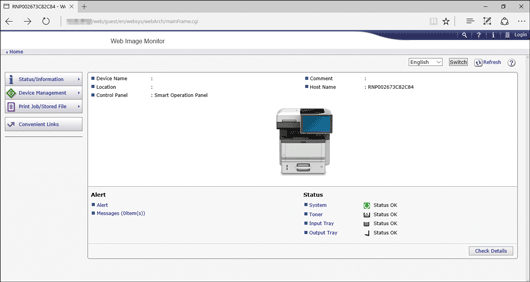
![]() Enter “http://(machine’s IP address or host name)/” in the URL bar.
Enter “http://(machine’s IP address or host name)/” in the URL bar.
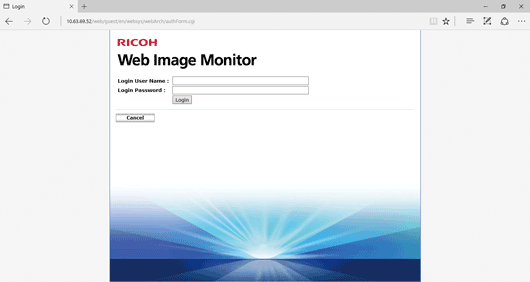
![]() Click [Login].
Click [Login].

![]() Enter the machine administrator's user name and password.
Enter the machine administrator's user name and password.
In the case of the default setting, the login user name and password are as follows:
Login User Name : "admin"
Login Password : " " (empty)

![]() Click [Google Cloud Print Settings].
Click [Google Cloud Print Settings].

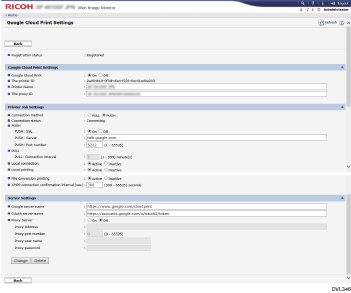
[Registration status]
The registration status of printers to Google Cloud Print is displayed. Confirm that your machine is registered.
[Google Cloud Print]
Specify whether or not to enable Google Cloud Print.
[The printer ID]
An ID notified from Google Cloud Server at the time of registration. This item is displayed only when registered.
[Printer Name]
The name of the printer to be displayed to users.
[The proxy ID]
Identification of the printer client or proxy.
[Connection method]
Specify how to connect to the Google cloud server.
[PULL]: Connect to the Google cloud server after the time set in [PULL: Connection interval].
[PUSH]: Connect to the Google cloud server with notification of XMPP.
[Connection status]
The connection status with Google's server is displayed. This item is displayed only when registered.
[PUSH: SSL]
Specify whether or not to use SSL for XMPP.
[PUSH: Server]
The name of the server to connect with XMPP. It is unnecessary to change this item until Google's server changes.
[PUSH: Port number]
The port number of the server to connect with XMPP.
[PULL: Connection interval]
Specify connection interval when connection method setting is [PULL].
[Local connection]:
Specify whether or not to enable Privet local discovery.
[Local printing]
Specify whether or not to enable Privet local printing API.
[File conversion printing]
Specify whether or not to enable Privet local conversion printing.
[XMPP connection confirmation interval]
Specify the time between XMPP channel pings.
[Google server name]
The name of the server to connect to when executing HTTPS API (/register etc.). It is unnecessary to change this item until Google's server changes.
[OAuth server name]
The name of the server to connect to when authenticating the printer (OAuth 2 Auth tokens destination server). It is unnecessary to change this item until Google's server changes.
[Proxy Server]
Specify whether or not to enable proxy server.
[Proxy Address]
When using a proxy server, specify the address of the proxy server.
[Proxy port number]
When using a proxy server, specify the port number of the proxy.
[Proxy user name]
When using a proxy server, specify the user name of the proxy.
[Proxy password]
When using a proxy server, specify the password of the proxy.
![]() Configure settings as necessary, and then click [Change]
Configure settings as necessary, and then click [Change]
![]() Enter the administrator password if you have registered the password in [Administrator Tools].
Enter the administrator password if you have registered the password in [Administrator Tools].
![]() Click [OK].
Click [OK].
![]() Close your web browser.
Close your web browser.
