Replacing the Staples
This section describes how to replace the staple cartridge.
When the unit is out of staples, the LED lights up. When you replace the staple cartridge, the LED turns off.
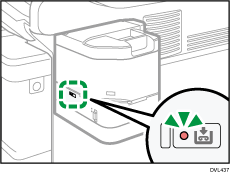
![]()
Use recommended staple cartridge. If you use a staple cartridges other than the recommended one, the staple unit may not work or it causes staple jam. For details, see Consumables.
Do not open the faceplate of the staple cartridge needlessly, or it may cause a malfunction. Open the faceplate of the staple cartridge only when removing a staple jam.
Do not eject the staple holder forcibly when there is a staple on the end of the staple cartridge. Doing so may cause the staple protrudes and staple jam. If a staple protrudes, replace the staple holder with a new one.
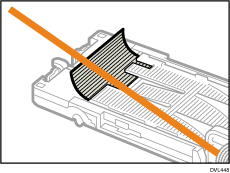
Do not apply strong impact such as fall it off to the floor, and the staple may be broken.
![]() Take the new staple holder from the box.
Take the new staple holder from the box.
![]() Turn off the machine.
Turn off the machine.
![]() Remove the staple unit from the staple unit cradle.
Remove the staple unit from the staple unit cradle.
![]() Remove the staple cartridge from the staple unit.
Remove the staple cartridge from the staple unit.
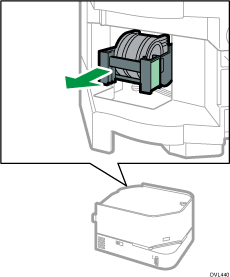
![]() Pinch the tab of the empty staple holder and remove it.
Pinch the tab of the empty staple holder and remove it.
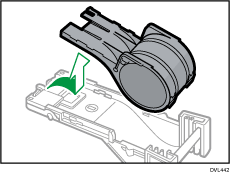
The staple cartridge need not to be replaced, so do not discard it.
The staple holder can not be reused. When discarding used staple holder, see Disposing of Used Staples.
![]() Set new staple holder to the staple cartridge until it clicks.
Set new staple holder to the staple cartridge until it clicks.
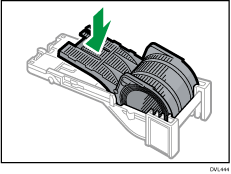
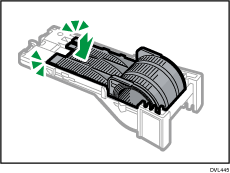
Even if the staple remains on the top of the staple cartridge, do not remove them when you attach the new staple holder.
![]() Insert the staple cartridge into the staple unit.
Insert the staple cartridge into the staple unit.
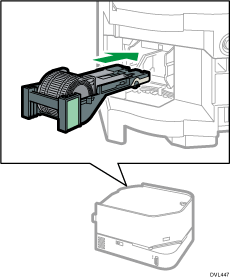
![]() Insert the staple unit into the staple unit cradle.
Insert the staple unit into the staple unit cradle.
![]()
You can turn off the LED by moving the switch in the small hole next to the LED. The LED does not turn on unless you move the slide switch back.
The staples may remain at the tip of the staple cartridge for continuous stapling even if the staple holder is replaced with a new one.
There is a thin gap between the remaining staples and a new staple holder. This gap disappears when some paper is stapled.
Related topics
