Changing the Paper Size in Trays
The paper size setting is changed in the same way for every paper tray.
![]()
Slide the side fences until they are aligned with the sides of the paper. If there is space between the side fences and the paper, it may cause the image to be misaligned.
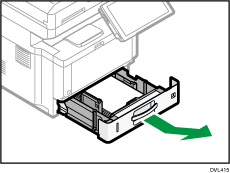
![]() Pull the paper tray carefully until it stops. Lift the front side of the tray, and then pull it out of the machine.
Pull the paper tray carefully until it stops. Lift the front side of the tray, and then pull it out of the machine.
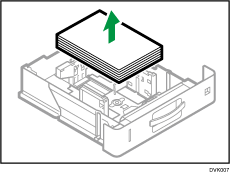
![]() Remove any paper that is in the tray.
Remove any paper that is in the tray.
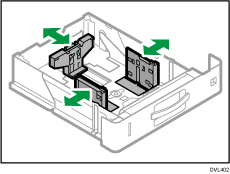
![]() Pinch the lever of the back fence and align it with the paper size. Next, pinch the lever of the right fence and align the right and left fences with the paper size.
Pinch the lever of the back fence and align it with the paper size. Next, pinch the lever of the right fence and align the right and left fences with the paper size.
![]() Load the new paper stack print side down.
Load the new paper stack print side down.

Do not stack paper over the limit mark.
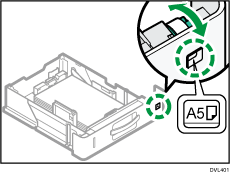
![]() Rotate the paper size dial, which is located at the front right of the tray, so that the size and the feed direction of the paper in the paper tray can be seen from the window.
Rotate the paper size dial, which is located at the front right of the tray, so that the size and the feed direction of the paper in the paper tray can be seen from the window.
Select "*" if the paper size you loaded is not on the dial.
![]() Lifting the front side of the tray, insert it into the machine, and then push it in carefully until it stops.
Lifting the front side of the tray, insert it into the machine, and then push it in carefully until it stops.
