Specifying the Option Settings
After installing the driver, check that the options installed on the machine have been reflected to the driver correctly. Change the option settings or specify the destinations as necessary.
![]() Display the "Devices and Printers" screen.
Display the "Devices and Printers" screen.
Windows 10 (version 1703 or later)
On the [Start] menu, click [Windows System]
 [Control Panel].
Click [View devices and printers].
Windows 10 (before version 1703), Windows Server 2016
Right-click [Start], and then click [Control Panel].
Click [View devices and printers].
Windows 8.1, Windows Server 2012/2012 R2
On the Charm Bar, click [Settings]
 [Control Panel].
Click [View devices and printers].
Windows 7, Windows Server 2012/2008 R2
On the [Start] menu, click [Devices and Printers].
Windows Server 2008
On the [Start] menu, click [Control Panel].
Select [Printer] on [Hardware and Sound].
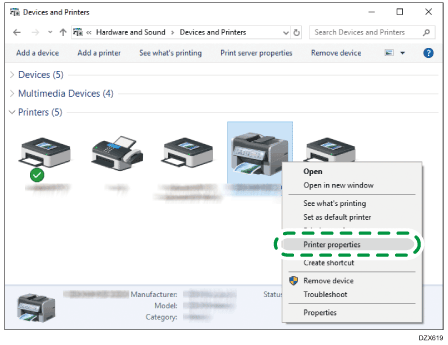
![]() Right-click the LAN-FAX icon, and then click [Printer properties].
Right-click the LAN-FAX icon, and then click [Printer properties].

For Windows Server 2008, right-click the machine, and then click [Properties].
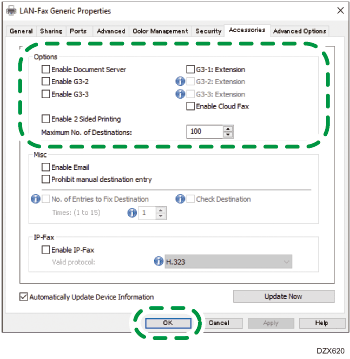
![]() On the "Accessories" tab, check that the options installed on the machine are selected, and then click [OK].
On the "Accessories" tab, check that the options installed on the machine are selected, and then click [OK].

When the machine is connected to the computer in the network, the machine imports the option settings automatically. If the option settings of the machine are not reflected, click [Update Now].
Set the items other than the option settings, use of Email or confirmation of the addresses for example, as necessary.
