Installing the LAN-Fax Driver from the CD-ROM
![]() Set the CD-ROM in the computer.
Set the CD-ROM in the computer.
If the installer does not start automatically, double-click Setup.exe in the root directory of the CD-ROM.
![]() Select a language, and then click [OK].
Select a language, and then click [OK].
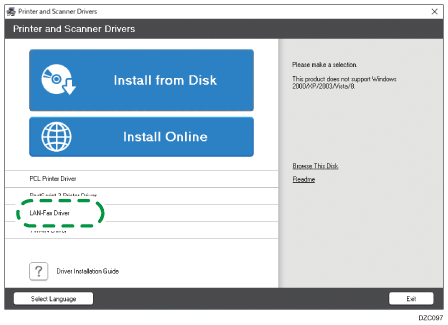
![]() Click [LAN-FAX Driver].
Click [LAN-FAX Driver].

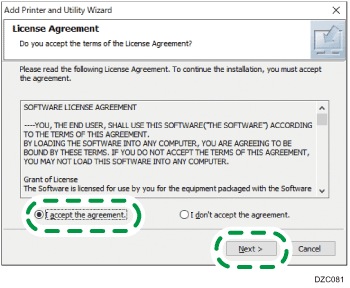
![]() On the "License Agreement" screen, select [I accept the agreement], and then click [Next].
On the "License Agreement" screen, select [I accept the agreement], and then click [Next].

![]() Click [Next].
Click [Next].
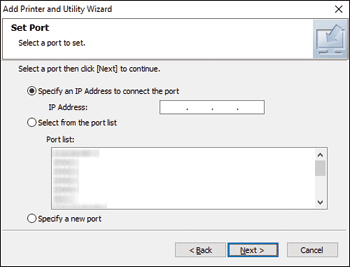
![]() Select a method to connect a port.
Select a method to connect a port.

Specify the port to use for the connection between the computer and machine using one of the following methods:
To specify the IP address
Enter the IP address of the machine, and then click [Next].
To select from the port list
Select the port to use for the connection between the computer and machine, and then click [Next].
To create a new port
Select [Specify a new port], and then click [Next].
On the "Add Printer and Utility Wizard" screen, select [Standard TCP/IP Port] and click [Next].
On the "Add Standard TCP/IP Printer Port Wizard" screen, click [Next].
On the "Add port" screen, enter the printer name or IP address of the machine, and then click [Next].
The port name is automatically entered. You can change the port name.
When the "Additional port information required" screen is displayed, select [RICOH Network Printer C model], and then click [Next].
Click [Finish].
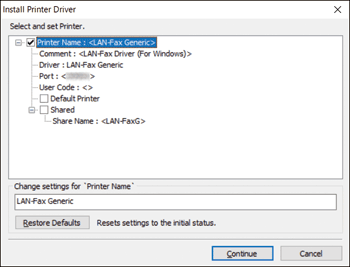
![]() Specify the name of the printer to install, and whether to use it as the default printer.
Specify the name of the printer to install, and whether to use it as the default printer.

![]() Click [Continue].
Click [Continue].
Printer driver installation starts.
![]() Click [Finish].
Click [Finish].
When you are prompted to restart your computer, restart it by following the instructions that appear.
