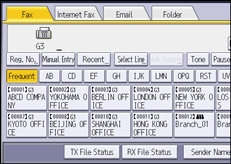
Registering Destinations in the Address Book from the Fax Screen
You can register a fax destination in the address book on the fax screen without opening the Settings screen. You can also register a destination that has been entered manually or from the transmission history.

You can also register a destination by pressing [Address Book] on the Home screen.
Registering New Destinations to the Address Book
On the standby screen, press [Prg. Dest.] to display the registration screen of the Address Book.
You can register the fax, IP-Fax, Internet Fax, e-mail, and folder destinations on this screen.

Depending on the security settings, [Prg. Dest.] might not appear and you might not be able to register the destination.
If the machine is specified as a managed client for the central address book management function, [Prg. Dest.] does not appear.
 Press [Fax (Classic)] on the Home screen.
 Press [Fax], [Internet Fax], [Email], or [Folder] to switch the transmission type.

 Press [Prg. Dest.].
 Enter the destination.
When registering an e-mail destination, select [Email Destination & Internet Fax Destination] for [Use Email Address As].
 Enter any necessary information.
 Press [OK].
Registering Entered Destinations to the Address Book
This section explains how to register a directly entered fax, IP-Fax, Internet Fax, or e-mail destination to the Address Book.
You can also register recent destinations on the [Recent Destinations] screen. (Press [Program Dest.] instead of [Prg. Dest.].)
 Press [Fax (Classic)] on the Home screen.
 Press [Fax], [Internet Fax], [Email], or [Folder] to switch the transmission type.

 Enter the destination.
 Press [Prg. Dest.].
 Enter any necessary information.
When registering an e-mail destination, select [Email Destination & Internet Fax Destination] for [Use Email Address As].
 Press [OK].
