![]() Display the Address Book screen.
Display the Address Book screen.
When using the standard operation panel
Press the [Home] key on the bottom left of the control panel, and press the [Address Book Management] icon on the [Home] screen.
When using the Smart Operation Panel
Press the [Home] key on the top left of the control panel. Flick the screen to the left, and then press the [Address Book Management] icon on the Home screen 4.
![]() Check that [Program / Change] is selected.
Check that [Program / Change] is selected.
![]() Select the name whose folder you want to register.
Select the name whose folder you want to register.
You can search by the registered name, user code, fax number, folder name, e-mail address, or IP-Fax destination.
![]() Press [Folder].
Press [Folder].
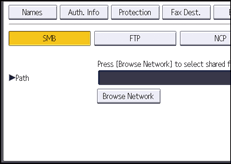
![]() Press [FTP].
Press [FTP].

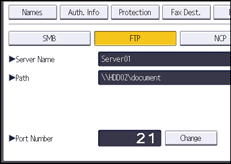
![]() Press [Change] under "Server Name".
Press [Change] under "Server Name".
![]() Enter the server name, and then press [OK].
Enter the server name, and then press [OK].
![]() Press [Change] under "Path".
Press [Change] under "Path".
![]() Enter the path, and then press [OK].
Enter the path, and then press [OK].
You can enter an absolute path, using this format: "\user\ home\username"; or a relative path, using this format: "directory\sub-directory".
If you leave the path blank, the login directory is assumed to be the current working directory.
You can also enter an IPv4 address.
You can enter a path up to 256 characters (256 bytes).
![]() To change the port number, press [Change] under "Port Number".
To change the port number, press [Change] under "Port Number".
![]() Enter the port number using the number keys, and then press the [
Enter the port number using the number keys, and then press the [![]() ] key.
] key.
You can enter 1 to 65535.
![]() Press [Connection Test] to check the path is set correctly.
Press [Connection Test] to check the path is set correctly.
![]() Press [Exit].
Press [Exit].
If the connection test fails, check the settings, and then try again.
![]() Press [Auth. Info], and then press [
Press [Auth. Info], and then press [![]() Next].
Next].

![]() Press [Specify Other Auth. Info] on the right side of "Folder Authentication".
Press [Specify Other Auth. Info] on the right side of "Folder Authentication".
When [Do not Specify] is selected, the FTP User Name and FTP Password that you have specified in "Default User Name / Password (Send)" of File Transfer settings are applied. For details, see File Transfer.
![]() Press [Change] under "Login User Name".
Press [Change] under "Login User Name".
![]() Enter the login user name, and then press [OK].
Enter the login user name, and then press [OK].
![]() Press [Change] under "Login Password".
Press [Change] under "Login Password".
![]() Enter the password, and then press [OK].
Enter the password, and then press [OK].
![]() Enter the password again to confirm, and then press [OK].
Enter the password again to confirm, and then press [OK].
![]() Press [OK].
Press [OK].
![]() Close the Address Book screen.
Close the Address Book screen.
When using the standard operation panel
Press the [User Tools/Counter] key.
When using the Smart Operation Panel
Press [User Tools/Counter] (
 ) on the top right of the screen.
![]()
To register the name, see Registering User Information.
You can enter up to 64 alphanumeric characters for the user name and password.
You can enter a server name up to 64 characters.
If User Authentication is specified, contact your administrator.
